Updated on Jan 31, 2009
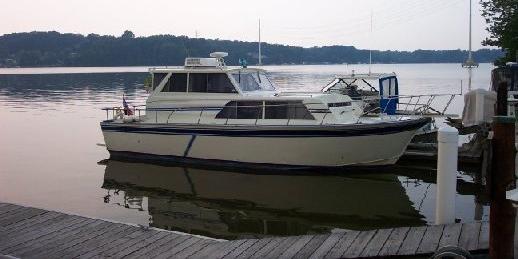
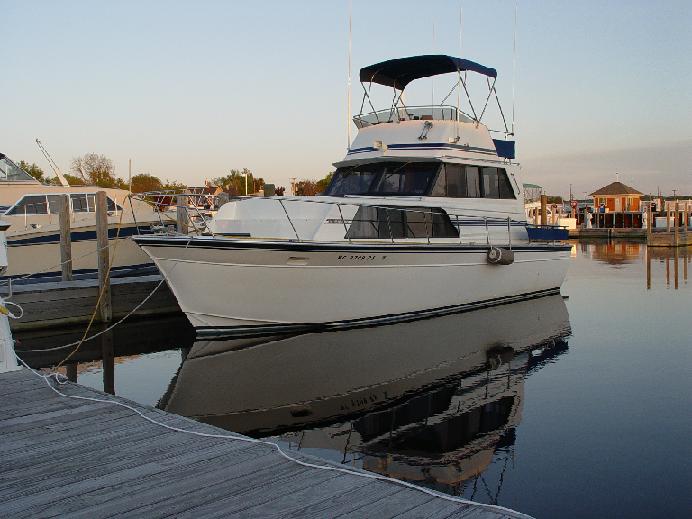
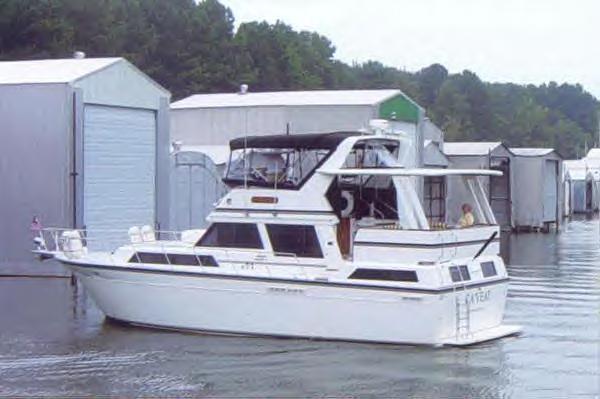
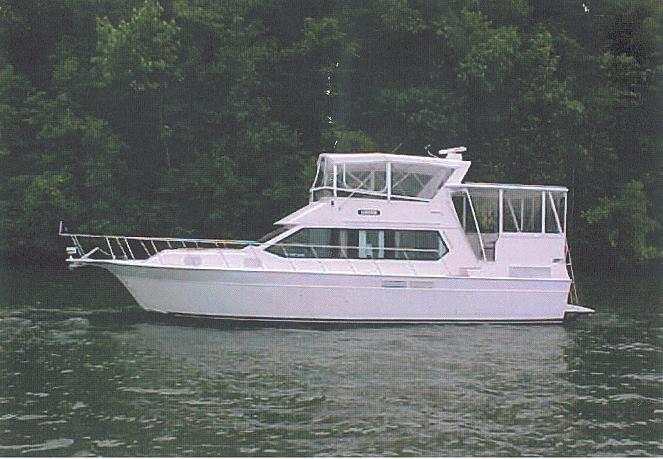
"Mystic", Fastjeff’s 1985, 32 Sedan, at its Slip on the Bush River
Another view of "Mystic", this time on Swan Creek (near Rock Hall, MD).
Please send your photos and ideas for improving/ repairing Marinettes to: fastjeff57@aol.com
Standard Weasel Word Statement: Though we try to make everything we recommend here accurate and correct, you are on your own. Don't want any lawyers pounding on my cabin door!
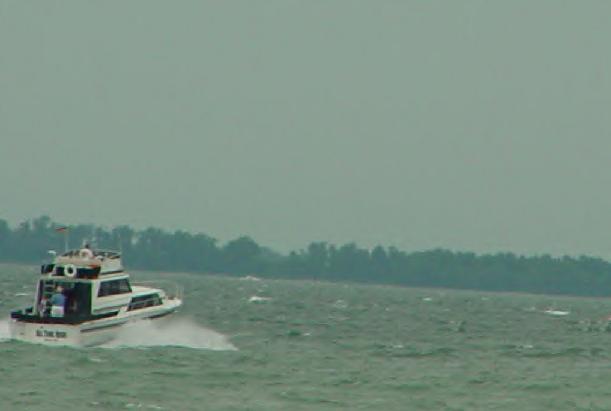
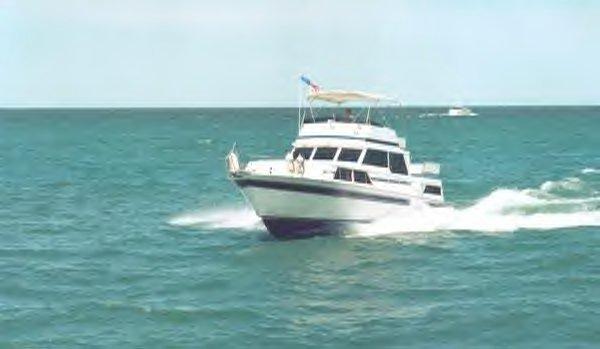
Here’s Joe Howard’s old 28 foot hardtop express cruising majestically along. He is the proud owner of a beautiful 37 footer now.
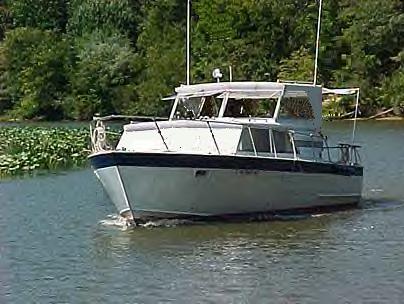
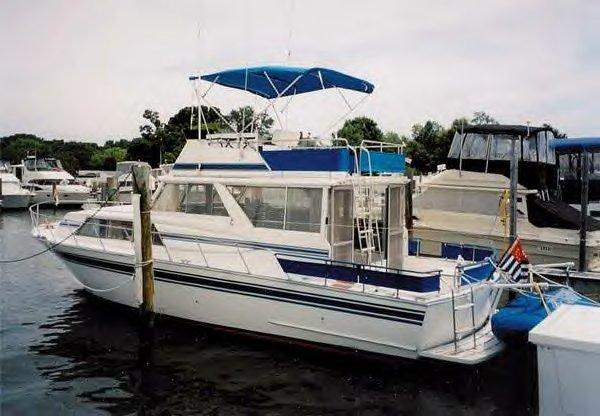
Karl's beautifully restored, 1986 32 footer heading out in some filthy weather. You wouldn't get me up on that flybridge today, brother!
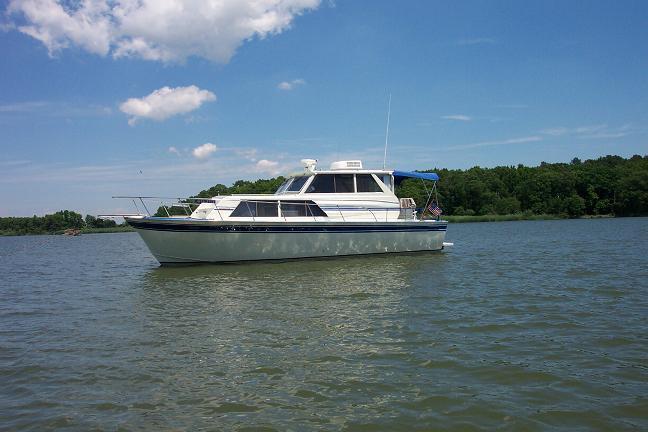
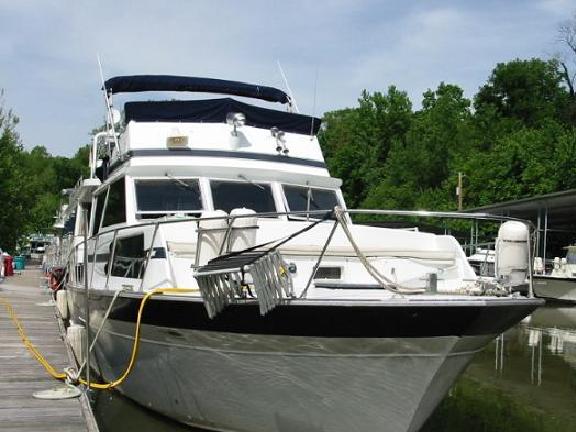
Here's Fred's 32 footer, a 1988 model.
An aft cabin 39 footer zooming along on a great day to be out boating.

Here's the "Moody White", Dean's 32 Express, getting ready to call it a season. Sure has lots of "helpers"
Imagine yourself just relaxing in this 37 footer's spacious salon!
Another 37 footer
A 41 foot Marquis
Two photos (above and below) of the largest Marinette I know of: a 44 foot beauty built in 1994.
Repair Methods, Ideas to Improve our Boats, and Some Other Items of Interest:
Low Water Pressure Alarm System:
Question: How long will a Raw Water Cooled motor last running along on plane if the raw water supply is suddenly cut off (by a rag over intake, thrown belt on pump, broken hose, etc)? Thirty seconds! Furthermore, the temperature sensors and alarm switches don’t work properly when not covered with water, so you can’t count on the gage or alarm system to save your motor. Obviously, another system is needed.
The system I developed (which is similar to those used on some modern outboards) is to monitor the raw water pressure. You’d be surprises how low this pressure is: At the exhaust manifold, at idle, it’s only 1 psi. The pressure rises to about 5 psi at 2,000 rpms—still low but still usable for a pressure switch.
You’ll need one adjustable pressure per motor. I found some switches on eBay that were adjustable from 1 to 6 psi—-perfect. I also located some 12 volt buzzers for the alarm. A trip to Radio Shack supplied the toggle switches. The wiring diagram (see sketch) is fairly simple: 12 volts goes to the switch, then to the buzzer, then to the pressure switches, with other side of the switch to ground. The box with the buzzers and the switches was then mounted near the helm. Install a tee in the intake manifold and screw in a barbed fitting (available at a hardware store). Run a hose from there to the pressure switch, and be sure to use a clamp at each end.
Note: The following is for raw water cooled engines ONLY.
Note: Mount the pressure switches close by and on the same level as the motor if possible. The bulkhead works well (see photo).
Calibration of the pressure switches is simple: Fire the engine, turn on the alarm, and adjust the pressure switch(s) until it sounds off. Next, rev the motor to 2,000 rpms and slowly turn the switch until the alarm turns off. (This takes two people.) Finally, drop the rpms back to idle and the alarm should go off. (If not, readjust.) This can be done in the slip for the water pressure there is the same in idle as when under way.
In operation, I flip the alarm toggle switches to ON then plane off. The beeping ends soon as the rpms come up. Dropping off plane, the beeping begins again soon as the motors settle down to idle. This provides me with a system check.
Click for a Photo
Click for a Photo
Click for a Photo
Click for a Photo
Click for a Photo
Much Better Ignition Wires (for Chrysler 318s and 360s):
Instead of jamming the stock wires between the valve cover and exhaust manifolds--and having them short to ground, or get installed on the wrong plug by confusion--you can use wires that go around the manifolds. I used Aqua Power (Morse) # 3038 wires for a big block Chevy. These wires will fit the distributor, and are the right length. (Chrysler 440 V-8 wires won't work.) If you can find Big Block Chevy wires with 90 degree plug ends, however, they will work much better.
Click for a Photo
Changing Rudder Bushings
This repair pertains to twin engined Marinettes, but the single screw models are similar. On my 1985, the port rudder was very sloppy in the bearings after 20 years of use. The starboard side—that doesn’t do as much work (the linkage comes in on the port side)—was in good shape. New bushings are available from Marinette Yachts, and they MUST be non-metallic.
The first step is to remove all the linkages and stuffing boxes, after which the rudders should drop right down with a minor push. The boat needs to be elevated enough for the rudder AND the post to come out, so if you’re planning to do this, be sure to have the boat blocked nice and high. That means the height of the rudder PLUS the length of the shaft inside the boat.
Removing the old bushing was a royal pain until I learned about a “magic” bushing removal tool, which is pictured in the “Tools“ photo: a lathe chisel that is sharpened backwards (so it cuts from the outside). It does a great job of getting the remains of the bushing out of there. (I also used it for removing the prop shaft bushing someone had epoxied in.) The first step to removing the bushing is to saber saw through the rubber and bakelite material for the length of the bushing (about 3 inches). Make this cut in several locations about the bushing—say, every 45 degrees. With luck the bushing will disintegrate and, with a little help from the “magic” tool, the rest will come right out.
Next comes cleaning the inside of the pipe, so the new bushing will go in without hanging up. I used a one inch drum sander for this task, complete with an extension shaft to get way down inside the pipe. The “Go gage” show in the “Tools” photo is used to ensure there are no obstructions left to hang the bushing up. The OD of the gage is just under what the pipe ID should be, so if it goes through okay, the bushing will fit nicely. Finally, one of the bushings had so corroded the aluminum pipe that the bushing was too loose, so I applied some PC-7 marine epoxy (Ace or True Value Hardware) to keep it in place.
Note: All of the tools shown in the photo are available, free of charge, to anyone doing this repair. Just pay the shipping costs, both ways.
The Tools Used in the Repair
The Port Rudder Linkage
Another View of the Port Rudder Linkage
Look Out! Note the Crack in the Rudder Tie Bar
The Stuffing Box Assembly
New Port Rudder Bushing in Place
The Port Rudder Linkage All Back Together
The Starboard Rudder Linkage All Back Together
Those Sloppy Morse Throttles
After many wrong turns and mistaken ideas, I finally discovered a way to fix those sloppy Morse throttles. The culprit is worn out plastic bushings. (See the below photo). The solution is to tighten the bushings up by inserting a .005 inch brass shim behind them. And don’t waste your time fixing the shifter side, for slop there doesn’t really matter.
On the second throttle I fixed, I had a tough time getting the shim and plastic bushing onto the lower arm. The steel bushing, that’s pressed onto the pot metal shaft, had a ridge worn in it that had to be sanded and filed away.
One more thing: The shift detent, which causes the lever to stay where it’s put (F-N-R) has an allen screw adjustment. The trick to adjusting it is to LOOSEN the allen screw, not to tighten it. Try it both ways and you’ll see what I mean.
Click for a Photo
Changing Raw Water Pump Impellers
This is a tough job on 'twins', and it's even tougher if you put the pump housing in backwards. (Ah-hem!) The impeller has to 'screw into the housing' in one direction as well. The below photo and diagram show how the parts go, but a smart mechanic marks the parts before taking them apart. (Ah-hem!) The impeller shown had at least three years running on it and was still good. Best to change them BEFORE they start throwing blades. If yours is chewed up, be sure to backflush the oil cooler, to remove the impeller pieces--or else the new one will be destroyed. (Thanks to Norm for the second photo below.)
Click for a Photo
Click for a Photo
Tool-less Throttle Adjusting
If you can't stand to have the throttle handles not being together at cruising speed this little trick is for you. The "spinner nut" allows one to adjust the throttle cable without tools. Note: It’s a # 10-32 thread.
Click for a Photo
Vee Belt Adjusting Tool
Here’s a nifty little tool for adjusting Vee belts that used to be available from J. C. Whitney. (I have yet to locate someone still making these things, but I'll keep trying.) The barrel of the tool expands as it’s turned to force the two pulleys (drive and alternator or water pump) further apart. You can also over-tighten the belts, so be careful.
Click for a Photo
Stuffing Box Wrenches
You need two of them to snug the nuts together, The one on the left in the below photo is homemade; the other is a plumber's tool that’s commonly available.
Click for a Photo
Higher Output Alternators
If you're sick of those old, under-performing alternators, then a rebuilt, high performance unit is the hot ticket. Unfortunately, the 50 amp circuit breaker Chrysler used, in series with the alternator output, is not up to the job. (That’s how I learned what those "50" amp relays were for.) When I could not find a suitable I used a 50 amp unit from NAPA ($30) and wired it in parallel to the stock breaker.
Click for a Photo
That Railing Mess
One of the curses of aluminum boats is corrosion where the railing posts are screwed to the deck. In the first photo the railing has been removed to reveal the usual mess below it. (The deck in this particular location had the usual "minor" paint blisters showing, and black crud had built up below the rubber gasket.) In the next photo the mess has been sanded down to bare metal. Note that corrosion is halfway through the deck in one spot! This was the worse case, but every post had some level of corrosion growing under it.
Click for a Photo
Click for a Photo
In the next photo, the aluminum step plate has been removed. Note that, though is a bit of corrosion near one of the screws, and some black crud hiding below it, there was none of the deep, ugly corrosion found under the railing posts. My conclusion: Those rubber gaskets are bad news!)
Click for a Photo
In the next photo, I'm installing aluminum rivets in 17/64 inch drilled holes. The homemade rivet setter in the left photo works great if there's room to swing the handle. When there isn't, a ratchet and grade 8 bolt and nuts have to do. Get several for they wear out.
Click for a Photo
In the last photo the aluminum rivets have been 'set' and 1/8 “ thick plastic washers are glued on top of them with silicone (since the washers are tough to locate under the posts unless they are glued in place.) A rubber gasket is NOT used, to prevent moisture trapped below the gasket setting up a corrosion cell.
Update: After 4 years, the railing bolts are all still nice and tight, and minimal corrosion has reappeared under the posts.
Click for a Photo
Those Oddball Thermostats
Shown below are the two sizes of thermostats commonly used in Chrysler marine engines. The large 'T-stat' on the right was used in the earlier engines (and cars/ trucks in the late '70s). The smaller 'T-stat' (on the left) has been epoxied and riveted to a stainless steel plate for use in the earlier engine. Why go to all that trouble? Those large, custom t-stats is shockingly expensive, and if the t-stat housing is rusted badly (around the t-stat, as often the case in old, RWCooled engines) water will pass the t-stat to delay warm up and proper temperature control.
Click for a Photo
Getting Water and Junk Out of the Gas
Most Marinettes have these Perko water separator/ filters. If yours needs draining, to remove water and crud, a small glass jar like this one is a great help. Remove the plug, drain the separator, then let the contents sit for a few moments. (Note the water and crud in the bottom of the jar in the photo.) Be sure to use teflon tape on the threads of the plug when you reinstall it. And take it easy tightening that plug or you might wrench the housing loose from the wooden blocks.
Click for a Photo
Where to look for a potential troublemaker; a bad ballast resistor.
Most Chrysler engines use a ballast resistor. If it burns out the engine will start as you crank it, then stall the instant you let go of the ignition switch. Also, the connectors can "fall off" and kill the engine. Better check yours.
Note: Older spark modules used 5 pins; newer ones use only 4. Both work the same--I have one of each on my boat. The fifth pin and the other circuit on the ballast resistor was put there in an exercise in over-engineering by Chrysler, who were famous for such antics.
Click for a Photo
An Additional, Stern Drain Plug
During winter lay up water will collect in the stern when the boat is blocked bow high. The threat of freeze damage forced me to add an extra drain plug here.
Click for a Photo
Changing Oil the Neat and Easy Way
Here’s a 'neat' (literally) way to change engine oil using an old propane tank. You can get these for nothing since the older ones are now illegal. One of your engines (with twins, or a nearby car or truck) is used as a vacuum pump. I use the PVC fitting on the carb for my vacuum source. A 'Tee fitting' in the tank allows air to exit while oil flows to the bottom of the tank through a length of pipe. All you need is a few common fittings, some Ľ inch steel brake tube (that you poke down the oil checking tube hole) and some 3/8 inch hoses for vacuum and oil. You’ll need to unscrew the dipstick fitting at the block to get the tubing down into the oil pan. I also use this rig to suck the oil out of the old filter before disposing of it, avoiding another mess.
Click for a Photo
My Many Battles With Water Getting into the Bilge
There’s some places where I absolutely hate water—like in the cabin, bilge, etc. Below is a photo of a good way to keep water on the cockpit floor from draining into the bilge. These 1.5 x 1/8 inch aluminum strips are sealed to the floor with 3M 5200 to act like a dam.
Click for a Photo
In the next photo, a homemade rain gutter (1 inch aluminum channel) keeps water out of the salon and cockpit areas. (For some reason Marinette omitted these--a major mistake.) The 1/8 inch thick aluminum “deflectors” at the ends were designed and tested the hard way, during a rainstorm! The trick is to aim the water so it falls harmlessly onto the walkway. The rain gutters Marinette installed atop of the side scoops also need to be modified. (Experiment with a hose and you’ll see what I mean--water flows out of them and right onto the cockpit floor.) I plugged the rear of the rain gutter with silicone, then drilled holes in the bottom. Water now falls onto the walkway instead of flooding the cockpit area.
Click for a Photo
Note: This modification was made on a Sedan. Not sure it’s applicable to the Express or Fisherman models.
Prop Shaft Removal Tools and Techniques
Removal of your prop shafts is not a job to look forward to, but the homemade puller shown below was a great help. Since the space between the flanges is tight, the length of the puller bolt is critical. Better have several different length bolts with you. Also, when you're nearly there, I have to use a 1/2 socket as a spacer to get the hub free in that last, frustrating amount of travel. A bit of additional space would have been nice here!
Click for a Photo
In the below photo, a prop shaft flange is about to be removed. On Marinettes, it’s important to replace aged rubber hoses that connect the packing boxes to the shaft logs. Should one of these hoses fail, enough water could enter that the boat to sink it. And no, your bilge pump could never keep up with a leak that huge.
Click for a Photo
In this photo the puller is in place on the port flange. Note how little room one has to swing a wrench! By the way, I now use a box/ open end wrench instead of the knucklebuster shown.
Click for a Photo
In this photo the starboard flange is finally off (thank heaven!) and the shaft log is exposed. Note the buildup of corrosion on the inside.
Click for a Photo
The components of a Marinette stuffing box assembly {left to right} are shown: The rubber hose that connects the "shaft log" (a pipe welded to the hull) to the stuffing box assembly, the bronze gland, the lock nut, the packing rings (1/4 inch for 1 1/4 inch shafts), and the gland nut. Contrary to most stuffing box designs, the packing rings go inside the gland nut. This is a 1 1/4 inch shaft, but other sizes are similar (but use different size packing rings).
Click for a Photo
A close up shot of a Marinette packing gland nut. Since the packing is placed inside the gland nut, the locking nut MUST be tightened to the gland nut to prevent the assembly from rotating along with the shaft. On the starboard side, the packing gland nut could back right off (in forward), flooding the boat with water; on the port side it could tighten up and burn up the shaft! So, be sure you lock those two nuts tightly together.
Click for a Photo
Here's a shot of the assembly all back together again. Important things to check: 1. Are the set screws (in the flange) seated in those dimples drilled in the shaft? (If not, the shaft could back out of the flange in reverse.) 2. Is the bronze packing gland assembly and aluminum shaft log touching? (They must not touch.) 3. Is the locking nut tightened against the gland nut, locking the gland nut in place? 4. Is there an open circuit between the transmission side flange and the shaft? (There should be no electrical continuity between the shaft and the hull.)
Click for a Photo
The Battle Against Corrosion:
A Possible Way to Reduce the Corrosion Mess Around the Railings
Nearly every Marinette goes through this: corrosion blisters appear on the deck surface near the stainless railing posts. The railings are then removed, the paint sanded to remove the corrosion, the deck repainted, and the railings reinstalled--but it doesn't seem to matter how carefully the repair was done, or if a sealer was used on the screw threads, for the mess will come back in a few years.
A successful approach is to use aluminum rivets to hold the railings in place. The idea is allow the easily-replaced rivets to corrode instead of the deck. The below photo shows the rivets installed in a test piece of scrap aluminum with a Marinette handrailing post attached. The holding strength of the rivets is excellent. A 17/64 inch (just a fraction over 1/4 ") hole is required for them--just the ticket for those already stripped out screw holes.
Note: After 4 years, the rivets have held tightly, and under railing post corrosion has been minimal.
The drawing below the photo is of a homemade installation tool. Hold the 'static' piece, to keep the rivet from rotating, and put about two turns on the rivet with the "nut" (that doesn't strip like a hex nut). A socket head allen bolt is the only high strength bolt I could find in this small size. A regular nut and bolt strips way too easily. Oh, better buy several of each for they wear out quickly.
Note: You can also buy a rivet gun with adapters to set the rivets. I honestly haven't tried it this way, but it's got to be an improvement.
Click for a Photo
Click for a Photo
Corrosion Caused by a Lack of Proper Maintenance
Needless to say, my first sight of this mess was a nasty shock! The damage is confined to the starboard prop area--the port side looks pretty good. How this happened is a mystery--perhaps something got jammed in the prop and it flailed away at the bottom paint (that was not properly applied in the "repair")? Or, perhaps some boob used a bronze-shell cutlass bearing in the strut? Either way, I aged a decade or so upon seeing this mess! Much epoxy putty later it's now flat and smooth again, and it has not caused any trouble after 4 years. Alternatively I could have hired someone to MIG weld the area back to solid aluminum. The bottom line: Sandblasting and proper repainting of this 1985 era hull, years ago, would have prevented this horror scene.
Click for a Photo
Here's an even worse disaster, this time on Keith's 1974, 28 footer. (Keith sandblasted the ENTIRE hull, from gunnel to gunnel, with a 5 hp. potable compressor! That's called dedication.) This was the worst spot in the photos he sent me but, unfortunately, it wasn't the only one. Again, the lack of a complete 'bottom job' (strip to bare metal and redue) after years of usage resulted in the bare metal spots that caused this crevice corrosion mess.
Click for a Photo
Homemade Galvanic Meter
This portable corrosion meter came with my boat since the Capac probe stopped working long ago. The analog meter that was in the box died when it fell overboard one day (don’t ask!), so I replaced it with a digital meter. The cables, for the probe and ground clip, are soldered to the meter leads and strain-relieved inside the box. If your Capac probe has failed, probes such as this can be purchased for 70 to 80 bucks. The meter cost me $4 at Harbor Freight. Buy a box from Radio Shack, along with some cable and a ground clamp, and you’re in good shape. Accuracy of the readings is better than the original Capac setup (whose needle tends to stick). And you can be a hero at your marina by testing other people's boat (long as your marina guys don't mind, or catch you).
Click for a Photo
"Hey, what are those funky looking things?"
This 'loaf of bread' is a magnesium anode, and it sure confuses lots of folks. It is bolted to the trim tab such that it does not interfere with its movement via two, 5/16 bolts threaded into the magnesium from below.
Note: This is for FRESH WATER boats only! Magnesium produces way too much voltage in salt water.
Click for a Photo
"Now, that's a guppy!" (Think of Crocodile Dundee saying this)
This little beauty alone adds 0.15 volts to my galvanic protection system. With a guppy added to mine the readings are too high, but it’s nice to have that option.
Click for a Photo
Protective Zincs in Your Heat Exchangers
Many people don't know this, but there's a zinc element that keeps the tubes of these expensive heat exchangers from rotting out. With replacement costs hovering in the 400 to 600 dollar range, one should replace these zincs on a regular basis. The drain plug in the bottom contains the zinc.
Click for a Photo
Click for a Photo
My Love of Boating in Photos:
The below photos reveal this better than anything I could say. This photo was taken at our old slip. That Great Blue Herron makes its food foray up the bank to the left every evening.
Click for a Photo
Night falls on the Bohemia River.
Click for a Photo
In this photo, night has spectacularly fallen over the Wye River, where we were anchored. Ah, to be there right now!
Click for a Photo
In the below shots we’re cruising the Bush River
Click for a Photo
Note how straight a course the "Admiral" is holding. Not bad, eh?
Click for a Photo
What is it about sunsets and sunrises that excite the imagination? In this photo, the sun is rising over the Chesapeake Bay, at Still Pond.
Click for a Photo
What is it about sunsets and sunrises that excite the imagination? In this photo, the sun is rising over the Chesapeake Bay, at Still Pond.
Another view of "Mystic", this time on Swan Creek (near Rock Hall, MD).
Please send your photos and ideas for improving/ repairing Marinettes to: fastjeff57@aol.com
Standard Weasel Word Statement: Though we try to make everything we recommend here accurate and correct, you are on your own. Don't want any lawyers pounding on my cabin door!
Here’s Joe Howard’s old 28 foot hardtop express cruising majestically along. He is the proud owner of a beautiful 37 footer now.
Karl's beautifully restored, 1986 32 footer heading out in some filthy weather. You wouldn't get me up on that flybridge today, brother!
Here's Fred's 32 footer, a 1988 model.
An aft cabin 39 footer zooming along on a great day to be out boating.
Here's the "Moody White", Dean's 32 Express, getting ready to call it a season. Sure has lots of "helpers"
Imagine yourself just relaxing in this 37 footer's spacious salon!
Another 37 footer
A 41 foot Marquis
Two photos (above and below) of the largest Marinette I know of: a 44 foot beauty built in 1994.
Repair Methods, Ideas to Improve our Boats, and Some Other Items of Interest:
Low Water Pressure Alarm System:
Question: How long will a Raw Water Cooled motor last running along on plane if the raw water supply is suddenly cut off (by a rag over intake, thrown belt on pump, broken hose, etc)? Thirty seconds! Furthermore, the temperature sensors and alarm switches don’t work properly when not covered with water, so you can’t count on the gage or alarm system to save your motor. Obviously, another system is needed.
The system I developed (which is similar to those used on some modern outboards) is to monitor the raw water pressure. You’d be surprises how low this pressure is: At the exhaust manifold, at idle, it’s only 1 psi. The pressure rises to about 5 psi at 2,000 rpms—still low but still usable for a pressure switch.
You’ll need one adjustable pressure per motor. I found some switches on eBay that were adjustable from 1 to 6 psi—-perfect. I also located some 12 volt buzzers for the alarm. A trip to Radio Shack supplied the toggle switches. The wiring diagram (see sketch) is fairly simple: 12 volts goes to the switch, then to the buzzer, then to the pressure switches, with other side of the switch to ground. The box with the buzzers and the switches was then mounted near the helm. Install a tee in the intake manifold and screw in a barbed fitting (available at a hardware store). Run a hose from there to the pressure switch, and be sure to use a clamp at each end.
Note: The following is for raw water cooled engines ONLY.
Note: Mount the pressure switches close by and on the same level as the motor if possible. The bulkhead works well (see photo).
Calibration of the pressure switches is simple: Fire the engine, turn on the alarm, and adjust the pressure switch(s) until it sounds off. Next, rev the motor to 2,000 rpms and slowly turn the switch until the alarm turns off. (This takes two people.) Finally, drop the rpms back to idle and the alarm should go off. (If not, readjust.) This can be done in the slip for the water pressure there is the same in idle as when under way.
In operation, I flip the alarm toggle switches to ON then plane off. The beeping ends soon as the rpms come up. Dropping off plane, the beeping begins again soon as the motors settle down to idle. This provides me with a system check.
Click for a Photo
Click for a Photo
Click for a Photo
Click for a Photo
Click for a Photo
Much Better Ignition Wires (for Chrysler 318s and 360s):
Instead of jamming the stock wires between the valve cover and exhaust manifolds--and having them short to ground, or get installed on the wrong plug by confusion--you can use wires that go around the manifolds. I used Aqua Power (Morse) # 3038 wires for a big block Chevy. These wires will fit the distributor, and are the right length. (Chrysler 440 V-8 wires won't work.) If you can find Big Block Chevy wires with 90 degree plug ends, however, they will work much better.
Click for a Photo
Changing Rudder Bushings
This repair pertains to twin engined Marinettes, but the single screw models are similar. On my 1985, the port rudder was very sloppy in the bearings after 20 years of use. The starboard side—that doesn’t do as much work (the linkage comes in on the port side)—was in good shape. New bushings are available from Marinette Yachts, and they MUST be non-metallic.
The first step is to remove all the linkages and stuffing boxes, after which the rudders should drop right down with a minor push. The boat needs to be elevated enough for the rudder AND the post to come out, so if you’re planning to do this, be sure to have the boat blocked nice and high. That means the height of the rudder PLUS the length of the shaft inside the boat.
Removing the old bushing was a royal pain until I learned about a “magic” bushing removal tool, which is pictured in the “Tools“ photo: a lathe chisel that is sharpened backwards (so it cuts from the outside). It does a great job of getting the remains of the bushing out of there. (I also used it for removing the prop shaft bushing someone had epoxied in.) The first step to removing the bushing is to saber saw through the rubber and bakelite material for the length of the bushing (about 3 inches). Make this cut in several locations about the bushing—say, every 45 degrees. With luck the bushing will disintegrate and, with a little help from the “magic” tool, the rest will come right out.
Next comes cleaning the inside of the pipe, so the new bushing will go in without hanging up. I used a one inch drum sander for this task, complete with an extension shaft to get way down inside the pipe. The “Go gage” show in the “Tools” photo is used to ensure there are no obstructions left to hang the bushing up. The OD of the gage is just under what the pipe ID should be, so if it goes through okay, the bushing will fit nicely. Finally, one of the bushings had so corroded the aluminum pipe that the bushing was too loose, so I applied some PC-7 marine epoxy (Ace or True Value Hardware) to keep it in place.
Note: All of the tools shown in the photo are available, free of charge, to anyone doing this repair. Just pay the shipping costs, both ways.
The Tools Used in the Repair
The Port Rudder Linkage
Another View of the Port Rudder Linkage
Look Out! Note the Crack in the Rudder Tie Bar
The Stuffing Box Assembly
New Port Rudder Bushing in Place
The Port Rudder Linkage All Back Together
The Starboard Rudder Linkage All Back Together
Those Sloppy Morse Throttles
After many wrong turns and mistaken ideas, I finally discovered a way to fix those sloppy Morse throttles. The culprit is worn out plastic bushings. (See the below photo). The solution is to tighten the bushings up by inserting a .005 inch brass shim behind them. And don’t waste your time fixing the shifter side, for slop there doesn’t really matter.
On the second throttle I fixed, I had a tough time getting the shim and plastic bushing onto the lower arm. The steel bushing, that’s pressed onto the pot metal shaft, had a ridge worn in it that had to be sanded and filed away.
One more thing: The shift detent, which causes the lever to stay where it’s put (F-N-R) has an allen screw adjustment. The trick to adjusting it is to LOOSEN the allen screw, not to tighten it. Try it both ways and you’ll see what I mean.
Click for a Photo
Changing Raw Water Pump Impellers
This is a tough job on 'twins', and it's even tougher if you put the pump housing in backwards. (Ah-hem!) The impeller has to 'screw into the housing' in one direction as well. The below photo and diagram show how the parts go, but a smart mechanic marks the parts before taking them apart. (Ah-hem!) The impeller shown had at least three years running on it and was still good. Best to change them BEFORE they start throwing blades. If yours is chewed up, be sure to backflush the oil cooler, to remove the impeller pieces--or else the new one will be destroyed. (Thanks to Norm for the second photo below.)
Click for a Photo
Click for a Photo
Tool-less Throttle Adjusting
If you can't stand to have the throttle handles not being together at cruising speed this little trick is for you. The "spinner nut" allows one to adjust the throttle cable without tools. Note: It’s a # 10-32 thread.
Click for a Photo
Vee Belt Adjusting Tool
Here’s a nifty little tool for adjusting Vee belts that used to be available from J. C. Whitney. (I have yet to locate someone still making these things, but I'll keep trying.) The barrel of the tool expands as it’s turned to force the two pulleys (drive and alternator or water pump) further apart. You can also over-tighten the belts, so be careful.
Click for a Photo
Stuffing Box Wrenches
You need two of them to snug the nuts together, The one on the left in the below photo is homemade; the other is a plumber's tool that’s commonly available.
Click for a Photo
Higher Output Alternators
If you're sick of those old, under-performing alternators, then a rebuilt, high performance unit is the hot ticket. Unfortunately, the 50 amp circuit breaker Chrysler used, in series with the alternator output, is not up to the job. (That’s how I learned what those "50" amp relays were for.) When I could not find a suitable I used a 50 amp unit from NAPA ($30) and wired it in parallel to the stock breaker.
Click for a Photo
That Railing Mess
One of the curses of aluminum boats is corrosion where the railing posts are screwed to the deck. In the first photo the railing has been removed to reveal the usual mess below it. (The deck in this particular location had the usual "minor" paint blisters showing, and black crud had built up below the rubber gasket.) In the next photo the mess has been sanded down to bare metal. Note that corrosion is halfway through the deck in one spot! This was the worse case, but every post had some level of corrosion growing under it.
Click for a Photo
Click for a Photo
In the next photo, the aluminum step plate has been removed. Note that, though is a bit of corrosion near one of the screws, and some black crud hiding below it, there was none of the deep, ugly corrosion found under the railing posts. My conclusion: Those rubber gaskets are bad news!)
Click for a Photo
In the next photo, I'm installing aluminum rivets in 17/64 inch drilled holes. The homemade rivet setter in the left photo works great if there's room to swing the handle. When there isn't, a ratchet and grade 8 bolt and nuts have to do. Get several for they wear out.
Click for a Photo
In the last photo the aluminum rivets have been 'set' and 1/8 “ thick plastic washers are glued on top of them with silicone (since the washers are tough to locate under the posts unless they are glued in place.) A rubber gasket is NOT used, to prevent moisture trapped below the gasket setting up a corrosion cell.
Update: After 4 years, the railing bolts are all still nice and tight, and minimal corrosion has reappeared under the posts.
Click for a Photo
Those Oddball Thermostats
Shown below are the two sizes of thermostats commonly used in Chrysler marine engines. The large 'T-stat' on the right was used in the earlier engines (and cars/ trucks in the late '70s). The smaller 'T-stat' (on the left) has been epoxied and riveted to a stainless steel plate for use in the earlier engine. Why go to all that trouble? Those large, custom t-stats is shockingly expensive, and if the t-stat housing is rusted badly (around the t-stat, as often the case in old, RWCooled engines) water will pass the t-stat to delay warm up and proper temperature control.
Click for a Photo
Getting Water and Junk Out of the Gas
Most Marinettes have these Perko water separator/ filters. If yours needs draining, to remove water and crud, a small glass jar like this one is a great help. Remove the plug, drain the separator, then let the contents sit for a few moments. (Note the water and crud in the bottom of the jar in the photo.) Be sure to use teflon tape on the threads of the plug when you reinstall it. And take it easy tightening that plug or you might wrench the housing loose from the wooden blocks.
Click for a Photo
Where to look for a potential troublemaker; a bad ballast resistor.
Most Chrysler engines use a ballast resistor. If it burns out the engine will start as you crank it, then stall the instant you let go of the ignition switch. Also, the connectors can "fall off" and kill the engine. Better check yours.
Note: Older spark modules used 5 pins; newer ones use only 4. Both work the same--I have one of each on my boat. The fifth pin and the other circuit on the ballast resistor was put there in an exercise in over-engineering by Chrysler, who were famous for such antics.
Click for a Photo
An Additional, Stern Drain Plug
During winter lay up water will collect in the stern when the boat is blocked bow high. The threat of freeze damage forced me to add an extra drain plug here.
Click for a Photo
Changing Oil the Neat and Easy Way
Here’s a 'neat' (literally) way to change engine oil using an old propane tank. You can get these for nothing since the older ones are now illegal. One of your engines (with twins, or a nearby car or truck) is used as a vacuum pump. I use the PVC fitting on the carb for my vacuum source. A 'Tee fitting' in the tank allows air to exit while oil flows to the bottom of the tank through a length of pipe. All you need is a few common fittings, some Ľ inch steel brake tube (that you poke down the oil checking tube hole) and some 3/8 inch hoses for vacuum and oil. You’ll need to unscrew the dipstick fitting at the block to get the tubing down into the oil pan. I also use this rig to suck the oil out of the old filter before disposing of it, avoiding another mess.
Click for a Photo
My Many Battles With Water Getting into the Bilge
There’s some places where I absolutely hate water—like in the cabin, bilge, etc. Below is a photo of a good way to keep water on the cockpit floor from draining into the bilge. These 1.5 x 1/8 inch aluminum strips are sealed to the floor with 3M 5200 to act like a dam.
Click for a Photo
In the next photo, a homemade rain gutter (1 inch aluminum channel) keeps water out of the salon and cockpit areas. (For some reason Marinette omitted these--a major mistake.) The 1/8 inch thick aluminum “deflectors” at the ends were designed and tested the hard way, during a rainstorm! The trick is to aim the water so it falls harmlessly onto the walkway. The rain gutters Marinette installed atop of the side scoops also need to be modified. (Experiment with a hose and you’ll see what I mean--water flows out of them and right onto the cockpit floor.) I plugged the rear of the rain gutter with silicone, then drilled holes in the bottom. Water now falls onto the walkway instead of flooding the cockpit area.
Click for a Photo
Note: This modification was made on a Sedan. Not sure it’s applicable to the Express or Fisherman models.
Prop Shaft Removal Tools and Techniques
Removal of your prop shafts is not a job to look forward to, but the homemade puller shown below was a great help. Since the space between the flanges is tight, the length of the puller bolt is critical. Better have several different length bolts with you. Also, when you're nearly there, I have to use a 1/2 socket as a spacer to get the hub free in that last, frustrating amount of travel. A bit of additional space would have been nice here!
Click for a Photo
In the below photo, a prop shaft flange is about to be removed. On Marinettes, it’s important to replace aged rubber hoses that connect the packing boxes to the shaft logs. Should one of these hoses fail, enough water could enter that the boat to sink it. And no, your bilge pump could never keep up with a leak that huge.
Click for a Photo
In this photo the puller is in place on the port flange. Note how little room one has to swing a wrench! By the way, I now use a box/ open end wrench instead of the knucklebuster shown.
Click for a Photo
In this photo the starboard flange is finally off (thank heaven!) and the shaft log is exposed. Note the buildup of corrosion on the inside.
Click for a Photo
The components of a Marinette stuffing box assembly {left to right} are shown: The rubber hose that connects the "shaft log" (a pipe welded to the hull) to the stuffing box assembly, the bronze gland, the lock nut, the packing rings (1/4 inch for 1 1/4 inch shafts), and the gland nut. Contrary to most stuffing box designs, the packing rings go inside the gland nut. This is a 1 1/4 inch shaft, but other sizes are similar (but use different size packing rings).
Click for a Photo
A close up shot of a Marinette packing gland nut. Since the packing is placed inside the gland nut, the locking nut MUST be tightened to the gland nut to prevent the assembly from rotating along with the shaft. On the starboard side, the packing gland nut could back right off (in forward), flooding the boat with water; on the port side it could tighten up and burn up the shaft! So, be sure you lock those two nuts tightly together.
Click for a Photo
Here's a shot of the assembly all back together again. Important things to check: 1. Are the set screws (in the flange) seated in those dimples drilled in the shaft? (If not, the shaft could back out of the flange in reverse.) 2. Is the bronze packing gland assembly and aluminum shaft log touching? (They must not touch.) 3. Is the locking nut tightened against the gland nut, locking the gland nut in place? 4. Is there an open circuit between the transmission side flange and the shaft? (There should be no electrical continuity between the shaft and the hull.)
Click for a Photo
The Battle Against Corrosion:
A Possible Way to Reduce the Corrosion Mess Around the Railings
Nearly every Marinette goes through this: corrosion blisters appear on the deck surface near the stainless railing posts. The railings are then removed, the paint sanded to remove the corrosion, the deck repainted, and the railings reinstalled--but it doesn't seem to matter how carefully the repair was done, or if a sealer was used on the screw threads, for the mess will come back in a few years.
A successful approach is to use aluminum rivets to hold the railings in place. The idea is allow the easily-replaced rivets to corrode instead of the deck. The below photo shows the rivets installed in a test piece of scrap aluminum with a Marinette handrailing post attached. The holding strength of the rivets is excellent. A 17/64 inch (just a fraction over 1/4 ") hole is required for them--just the ticket for those already stripped out screw holes.
Note: After 4 years, the rivets have held tightly, and under railing post corrosion has been minimal.
The drawing below the photo is of a homemade installation tool. Hold the 'static' piece, to keep the rivet from rotating, and put about two turns on the rivet with the "nut" (that doesn't strip like a hex nut). A socket head allen bolt is the only high strength bolt I could find in this small size. A regular nut and bolt strips way too easily. Oh, better buy several of each for they wear out quickly.
Note: You can also buy a rivet gun with adapters to set the rivets. I honestly haven't tried it this way, but it's got to be an improvement.
Click for a Photo
Click for a Photo
Corrosion Caused by a Lack of Proper Maintenance
Needless to say, my first sight of this mess was a nasty shock! The damage is confined to the starboard prop area--the port side looks pretty good. How this happened is a mystery--perhaps something got jammed in the prop and it flailed away at the bottom paint (that was not properly applied in the "repair")? Or, perhaps some boob used a bronze-shell cutlass bearing in the strut? Either way, I aged a decade or so upon seeing this mess! Much epoxy putty later it's now flat and smooth again, and it has not caused any trouble after 4 years. Alternatively I could have hired someone to MIG weld the area back to solid aluminum. The bottom line: Sandblasting and proper repainting of this 1985 era hull, years ago, would have prevented this horror scene.
Click for a Photo
Here's an even worse disaster, this time on Keith's 1974, 28 footer. (Keith sandblasted the ENTIRE hull, from gunnel to gunnel, with a 5 hp. potable compressor! That's called dedication.) This was the worst spot in the photos he sent me but, unfortunately, it wasn't the only one. Again, the lack of a complete 'bottom job' (strip to bare metal and redue) after years of usage resulted in the bare metal spots that caused this crevice corrosion mess.
Click for a Photo
Homemade Galvanic Meter
This portable corrosion meter came with my boat since the Capac probe stopped working long ago. The analog meter that was in the box died when it fell overboard one day (don’t ask!), so I replaced it with a digital meter. The cables, for the probe and ground clip, are soldered to the meter leads and strain-relieved inside the box. If your Capac probe has failed, probes such as this can be purchased for 70 to 80 bucks. The meter cost me $4 at Harbor Freight. Buy a box from Radio Shack, along with some cable and a ground clamp, and you’re in good shape. Accuracy of the readings is better than the original Capac setup (whose needle tends to stick). And you can be a hero at your marina by testing other people's boat (long as your marina guys don't mind, or catch you).
Click for a Photo
"Hey, what are those funky looking things?"
This 'loaf of bread' is a magnesium anode, and it sure confuses lots of folks. It is bolted to the trim tab such that it does not interfere with its movement via two, 5/16 bolts threaded into the magnesium from below.
Note: This is for FRESH WATER boats only! Magnesium produces way too much voltage in salt water.
Click for a Photo
"Now, that's a guppy!" (Think of Crocodile Dundee saying this)
This little beauty alone adds 0.15 volts to my galvanic protection system. With a guppy added to mine the readings are too high, but it’s nice to have that option.
Click for a Photo
Protective Zincs in Your Heat Exchangers
Many people don't know this, but there's a zinc element that keeps the tubes of these expensive heat exchangers from rotting out. With replacement costs hovering in the 400 to 600 dollar range, one should replace these zincs on a regular basis. The drain plug in the bottom contains the zinc.
Click for a Photo
Click for a Photo
My Love of Boating in Photos:
The below photos reveal this better than anything I could say. This photo was taken at our old slip. That Great Blue Herron makes its food foray up the bank to the left every evening.
Click for a Photo
Night falls on the Bohemia River.
Click for a Photo
In this photo, night has spectacularly fallen over the Wye River, where we were anchored. Ah, to be there right now!
Click for a Photo
In the below shots we’re cruising the Bush River
Click for a Photo
Note how straight a course the "Admiral" is holding. Not bad, eh?
Click for a Photo
What is it about sunsets and sunrises that excite the imagination? In this photo, the sun is rising over the Chesapeake Bay, at Still Pond.
Click for a Photo
What is it about sunsets and sunrises that excite the imagination? In this photo, the sun is rising over the Chesapeake Bay, at Still Pond.
Click for a Photo
Click for a Photo
Click for a Photo
Click for a Photo
Much Better Ignition Wires (for Chrysler 318s and 360s):
Instead of jamming the stock wires between the valve cover and exhaust manifolds--and having them short to ground, or get installed on the wrong plug by confusion--you can use wires that go around the manifolds. I used Aqua Power (Morse) # 3038 wires for a big block Chevy. These wires will fit the distributor, and are the right length. (Chrysler 440 V-8 wires won't work.) If you can find Big Block Chevy wires with 90 degree plug ends, however, they will work much better.
Click for a Photo
Changing Rudder Bushings
This repair pertains to twin engined Marinettes, but the single screw models are similar. On my 1985, the port rudder was very sloppy in the bearings after 20 years of use. The starboard side—that doesn’t do as much work (the linkage comes in on the port side)—was in good shape. New bushings are available from Marinette Yachts, and they MUST be non-metallic.
The first step is to remove all the linkages and stuffing boxes, after which the rudders should drop right down with a minor push. The boat needs to be elevated enough for the rudder AND the post to come out, so if you’re planning to do this, be sure to have the boat blocked nice and high. That means the height of the rudder PLUS the length of the shaft inside the boat.
Removing the old bushing was a royal pain until I learned about a “magic” bushing removal tool, which is pictured in the “Tools“ photo: a lathe chisel that is sharpened backwards (so it cuts from the outside). It does a great job of getting the remains of the bushing out of there. (I also used it for removing the prop shaft bushing someone had epoxied in.) The first step to removing the bushing is to saber saw through the rubber and bakelite material for the length of the bushing (about 3 inches). Make this cut in several locations about the bushing—say, every 45 degrees. With luck the bushing will disintegrate and, with a little help from the “magic” tool, the rest will come right out.
Next comes cleaning the inside of the pipe, so the new bushing will go in without hanging up. I used a one inch drum sander for this task, complete with an extension shaft to get way down inside the pipe. The “Go gage” show in the “Tools” photo is used to ensure there are no obstructions left to hang the bushing up. The OD of the gage is just under what the pipe ID should be, so if it goes through okay, the bushing will fit nicely. Finally, one of the bushings had so corroded the aluminum pipe that the bushing was too loose, so I applied some PC-7 marine epoxy (Ace or True Value Hardware) to keep it in place.
Note: All of the tools shown in the photo are available, free of charge, to anyone doing this repair. Just pay the shipping costs, both ways.
The Tools Used in the Repair
The Port Rudder Linkage
Another View of the Port Rudder Linkage
Look Out! Note the Crack in the Rudder Tie Bar
The Stuffing Box Assembly
New Port Rudder Bushing in Place
The Port Rudder Linkage All Back Together
The Starboard Rudder Linkage All Back Together
Those Sloppy Morse Throttles
After many wrong turns and mistaken ideas, I finally discovered a way to fix those sloppy Morse throttles. The culprit is worn out plastic bushings. (See the below photo). The solution is to tighten the bushings up by inserting a .005 inch brass shim behind them. And don’t waste your time fixing the shifter side, for slop there doesn’t really matter.
On the second throttle I fixed, I had a tough time getting the shim and plastic bushing onto the lower arm. The steel bushing, that’s pressed onto the pot metal shaft, had a ridge worn in it that had to be sanded and filed away.
One more thing: The shift detent, which causes the lever to stay where it’s put (F-N-R) has an allen screw adjustment. The trick to adjusting it is to LOOSEN the allen screw, not to tighten it. Try it both ways and you’ll see what I mean.
Click for a Photo
Changing Raw Water Pump Impellers
This is a tough job on 'twins', and it's even tougher if you put the pump housing in backwards. (Ah-hem!) The impeller has to 'screw into the housing' in one direction as well. The below photo and diagram show how the parts go, but a smart mechanic marks the parts before taking them apart. (Ah-hem!) The impeller shown had at least three years running on it and was still good. Best to change them BEFORE they start throwing blades. If yours is chewed up, be sure to backflush the oil cooler, to remove the impeller pieces--or else the new one will be destroyed. (Thanks to Norm for the second photo below.)
Click for a Photo
Click for a Photo
Tool-less Throttle Adjusting
If you can't stand to have the throttle handles not being together at cruising speed this little trick is for you. The "spinner nut" allows one to adjust the throttle cable without tools. Note: It’s a # 10-32 thread.
Click for a Photo
Vee Belt Adjusting Tool
Here’s a nifty little tool for adjusting Vee belts that used to be available from J. C. Whitney. (I have yet to locate someone still making these things, but I'll keep trying.) The barrel of the tool expands as it’s turned to force the two pulleys (drive and alternator or water pump) further apart. You can also over-tighten the belts, so be careful.
Click for a Photo
Stuffing Box Wrenches
You need two of them to snug the nuts together, The one on the left in the below photo is homemade; the other is a plumber's tool that’s commonly available.
Click for a Photo
Higher Output Alternators
If you're sick of those old, under-performing alternators, then a rebuilt, high performance unit is the hot ticket. Unfortunately, the 50 amp circuit breaker Chrysler used, in series with the alternator output, is not up to the job. (That’s how I learned what those "50" amp relays were for.) When I could not find a suitable I used a 50 amp unit from NAPA ($30) and wired it in parallel to the stock breaker.
Click for a Photo
That Railing Mess
One of the curses of aluminum boats is corrosion where the railing posts are screwed to the deck. In the first photo the railing has been removed to reveal the usual mess below it. (The deck in this particular location had the usual "minor" paint blisters showing, and black crud had built up below the rubber gasket.) In the next photo the mess has been sanded down to bare metal. Note that corrosion is halfway through the deck in one spot! This was the worse case, but every post had some level of corrosion growing under it.
Click for a Photo
Click for a Photo
In the next photo, the aluminum step plate has been removed. Note that, though is a bit of corrosion near one of the screws, and some black crud hiding below it, there was none of the deep, ugly corrosion found under the railing posts. My conclusion: Those rubber gaskets are bad news!)
Click for a Photo
In the next photo, I'm installing aluminum rivets in 17/64 inch drilled holes. The homemade rivet setter in the left photo works great if there's room to swing the handle. When there isn't, a ratchet and grade 8 bolt and nuts have to do. Get several for they wear out.
Click for a Photo
In the last photo the aluminum rivets have been 'set' and 1/8 “ thick plastic washers are glued on top of them with silicone (since the washers are tough to locate under the posts unless they are glued in place.) A rubber gasket is NOT used, to prevent moisture trapped below the gasket setting up a corrosion cell.
Update: After 4 years, the railing bolts are all still nice and tight, and minimal corrosion has reappeared under the posts.
Click for a Photo
Those Oddball Thermostats
Shown below are the two sizes of thermostats commonly used in Chrysler marine engines. The large 'T-stat' on the right was used in the earlier engines (and cars/ trucks in the late '70s). The smaller 'T-stat' (on the left) has been epoxied and riveted to a stainless steel plate for use in the earlier engine. Why go to all that trouble? Those large, custom t-stats is shockingly expensive, and if the t-stat housing is rusted badly (around the t-stat, as often the case in old, RWCooled engines) water will pass the t-stat to delay warm up and proper temperature control.
Click for a Photo
Getting Water and Junk Out of the Gas
Most Marinettes have these Perko water separator/ filters. If yours needs draining, to remove water and crud, a small glass jar like this one is a great help. Remove the plug, drain the separator, then let the contents sit for a few moments. (Note the water and crud in the bottom of the jar in the photo.) Be sure to use teflon tape on the threads of the plug when you reinstall it. And take it easy tightening that plug or you might wrench the housing loose from the wooden blocks.
Click for a Photo
Where to look for a potential troublemaker; a bad ballast resistor.
Most Chrysler engines use a ballast resistor. If it burns out the engine will start as you crank it, then stall the instant you let go of the ignition switch. Also, the connectors can "fall off" and kill the engine. Better check yours.
Note: Older spark modules used 5 pins; newer ones use only 4. Both work the same--I have one of each on my boat. The fifth pin and the other circuit on the ballast resistor was put there in an exercise in over-engineering by Chrysler, who were famous for such antics.
Click for a Photo
An Additional, Stern Drain Plug
During winter lay up water will collect in the stern when the boat is blocked bow high. The threat of freeze damage forced me to add an extra drain plug here.
Click for a Photo
Changing Oil the Neat and Easy Way
Here’s a 'neat' (literally) way to change engine oil using an old propane tank. You can get these for nothing since the older ones are now illegal. One of your engines (with twins, or a nearby car or truck) is used as a vacuum pump. I use the PVC fitting on the carb for my vacuum source. A 'Tee fitting' in the tank allows air to exit while oil flows to the bottom of the tank through a length of pipe. All you need is a few common fittings, some Ľ inch steel brake tube (that you poke down the oil checking tube hole) and some 3/8 inch hoses for vacuum and oil. You’ll need to unscrew the dipstick fitting at the block to get the tubing down into the oil pan. I also use this rig to suck the oil out of the old filter before disposing of it, avoiding another mess.
Click for a Photo
My Many Battles With Water Getting into the Bilge
There’s some places where I absolutely hate water—like in the cabin, bilge, etc. Below is a photo of a good way to keep water on the cockpit floor from draining into the bilge. These 1.5 x 1/8 inch aluminum strips are sealed to the floor with 3M 5200 to act like a dam.
Click for a Photo
In the next photo, a homemade rain gutter (1 inch aluminum channel) keeps water out of the salon and cockpit areas. (For some reason Marinette omitted these--a major mistake.) The 1/8 inch thick aluminum “deflectors” at the ends were designed and tested the hard way, during a rainstorm! The trick is to aim the water so it falls harmlessly onto the walkway. The rain gutters Marinette installed atop of the side scoops also need to be modified. (Experiment with a hose and you’ll see what I mean--water flows out of them and right onto the cockpit floor.) I plugged the rear of the rain gutter with silicone, then drilled holes in the bottom. Water now falls onto the walkway instead of flooding the cockpit area.
Click for a Photo
Note: This modification was made on a Sedan. Not sure it’s applicable to the Express or Fisherman models.
Prop Shaft Removal Tools and Techniques
Removal of your prop shafts is not a job to look forward to, but the homemade puller shown below was a great help. Since the space between the flanges is tight, the length of the puller bolt is critical. Better have several different length bolts with you. Also, when you're nearly there, I have to use a 1/2 socket as a spacer to get the hub free in that last, frustrating amount of travel. A bit of additional space would have been nice here!
Click for a Photo
In the below photo, a prop shaft flange is about to be removed. On Marinettes, it’s important to replace aged rubber hoses that connect the packing boxes to the shaft logs. Should one of these hoses fail, enough water could enter that the boat to sink it. And no, your bilge pump could never keep up with a leak that huge.
Click for a Photo
In this photo the puller is in place on the port flange. Note how little room one has to swing a wrench! By the way, I now use a box/ open end wrench instead of the knucklebuster shown.
Click for a Photo
In this photo the starboard flange is finally off (thank heaven!) and the shaft log is exposed. Note the buildup of corrosion on the inside.
Click for a Photo
The components of a Marinette stuffing box assembly {left to right} are shown: The rubber hose that connects the "shaft log" (a pipe welded to the hull) to the stuffing box assembly, the bronze gland, the lock nut, the packing rings (1/4 inch for 1 1/4 inch shafts), and the gland nut. Contrary to most stuffing box designs, the packing rings go inside the gland nut. This is a 1 1/4 inch shaft, but other sizes are similar (but use different size packing rings).
Click for a Photo
A close up shot of a Marinette packing gland nut. Since the packing is placed inside the gland nut, the locking nut MUST be tightened to the gland nut to prevent the assembly from rotating along with the shaft. On the starboard side, the packing gland nut could back right off (in forward), flooding the boat with water; on the port side it could tighten up and burn up the shaft! So, be sure you lock those two nuts tightly together.
Click for a Photo
Here's a shot of the assembly all back together again. Important things to check: 1. Are the set screws (in the flange) seated in those dimples drilled in the shaft? (If not, the shaft could back out of the flange in reverse.) 2. Is the bronze packing gland assembly and aluminum shaft log touching? (They must not touch.) 3. Is the locking nut tightened against the gland nut, locking the gland nut in place? 4. Is there an open circuit between the transmission side flange and the shaft? (There should be no electrical continuity between the shaft and the hull.)
Click for a Photo
The Battle Against Corrosion:
A Possible Way to Reduce the Corrosion Mess Around the Railings
Nearly every Marinette goes through this: corrosion blisters appear on the deck surface near the stainless railing posts. The railings are then removed, the paint sanded to remove the corrosion, the deck repainted, and the railings reinstalled--but it doesn't seem to matter how carefully the repair was done, or if a sealer was used on the screw threads, for the mess will come back in a few years.
A successful approach is to use aluminum rivets to hold the railings in place. The idea is allow the easily-replaced rivets to corrode instead of the deck. The below photo shows the rivets installed in a test piece of scrap aluminum with a Marinette handrailing post attached. The holding strength of the rivets is excellent. A 17/64 inch (just a fraction over 1/4 ") hole is required for them--just the ticket for those already stripped out screw holes.
Note: After 4 years, the rivets have held tightly, and under railing post corrosion has been minimal.
The drawing below the photo is of a homemade installation tool. Hold the 'static' piece, to keep the rivet from rotating, and put about two turns on the rivet with the "nut" (that doesn't strip like a hex nut). A socket head allen bolt is the only high strength bolt I could find in this small size. A regular nut and bolt strips way too easily. Oh, better buy several of each for they wear out quickly.
Note: You can also buy a rivet gun with adapters to set the rivets. I honestly haven't tried it this way, but it's got to be an improvement.
Click for a Photo
Click for a Photo
Corrosion Caused by a Lack of Proper Maintenance
Needless to say, my first sight of this mess was a nasty shock! The damage is confined to the starboard prop area--the port side looks pretty good. How this happened is a mystery--perhaps something got jammed in the prop and it flailed away at the bottom paint (that was not properly applied in the "repair")? Or, perhaps some boob used a bronze-shell cutlass bearing in the strut? Either way, I aged a decade or so upon seeing this mess! Much epoxy putty later it's now flat and smooth again, and it has not caused any trouble after 4 years. Alternatively I could have hired someone to MIG weld the area back to solid aluminum. The bottom line: Sandblasting and proper repainting of this 1985 era hull, years ago, would have prevented this horror scene.
Click for a Photo
Here's an even worse disaster, this time on Keith's 1974, 28 footer. (Keith sandblasted the ENTIRE hull, from gunnel to gunnel, with a 5 hp. potable compressor! That's called dedication.) This was the worst spot in the photos he sent me but, unfortunately, it wasn't the only one. Again, the lack of a complete 'bottom job' (strip to bare metal and redue) after years of usage resulted in the bare metal spots that caused this crevice corrosion mess.
Click for a Photo
Homemade Galvanic Meter
This portable corrosion meter came with my boat since the Capac probe stopped working long ago. The analog meter that was in the box died when it fell overboard one day (don’t ask!), so I replaced it with a digital meter. The cables, for the probe and ground clip, are soldered to the meter leads and strain-relieved inside the box. If your Capac probe has failed, probes such as this can be purchased for 70 to 80 bucks. The meter cost me $4 at Harbor Freight. Buy a box from Radio Shack, along with some cable and a ground clamp, and you’re in good shape. Accuracy of the readings is better than the original Capac setup (whose needle tends to stick). And you can be a hero at your marina by testing other people's boat (long as your marina guys don't mind, or catch you).
Click for a Photo
"Hey, what are those funky looking things?"
This 'loaf of bread' is a magnesium anode, and it sure confuses lots of folks. It is bolted to the trim tab such that it does not interfere with its movement via two, 5/16 bolts threaded into the magnesium from below.
Note: This is for FRESH WATER boats only! Magnesium produces way too much voltage in salt water.
Click for a Photo
"Now, that's a guppy!" (Think of Crocodile Dundee saying this)
This little beauty alone adds 0.15 volts to my galvanic protection system. With a guppy added to mine the readings are too high, but it’s nice to have that option.
Click for a Photo
Protective Zincs in Your Heat Exchangers
Many people don't know this, but there's a zinc element that keeps the tubes of these expensive heat exchangers from rotting out. With replacement costs hovering in the 400 to 600 dollar range, one should replace these zincs on a regular basis. The drain plug in the bottom contains the zinc.
Click for a Photo
Click for a Photo
My Love of Boating in Photos:
The below photos reveal this better than anything I could say. This photo was taken at our old slip. That Great Blue Herron makes its food foray up the bank to the left every evening.
Click for a Photo
Night falls on the Bohemia River.
Click for a Photo
In this photo, night has spectacularly fallen over the Wye River, where we were anchored. Ah, to be there right now!
Click for a Photo
In the below shots we’re cruising the Bush River
Click for a Photo
Note how straight a course the "Admiral" is holding. Not bad, eh?
Click for a Photo
What is it about sunsets and sunrises that excite the imagination? In this photo, the sun is rising over the Chesapeake Bay, at Still Pond.
Click for a Photo
What is it about sunsets and sunrises that excite the imagination? In this photo, the sun is rising over the Chesapeake Bay, at Still Pond.
Click for a Photo
Click for a Photo
Much Better Ignition Wires (for Chrysler 318s and 360s):
Instead of jamming the stock wires between the valve cover and exhaust manifolds--and having them short to ground, or get installed on the wrong plug by confusion--you can use wires that go around the manifolds. I used Aqua Power (Morse) # 3038 wires for a big block Chevy. These wires will fit the distributor, and are the right length. (Chrysler 440 V-8 wires won't work.) If you can find Big Block Chevy wires with 90 degree plug ends, however, they will work much better.
Click for a Photo
Changing Rudder Bushings
This repair pertains to twin engined Marinettes, but the single screw models are similar. On my 1985, the port rudder was very sloppy in the bearings after 20 years of use. The starboard side—that doesn’t do as much work (the linkage comes in on the port side)—was in good shape. New bushings are available from Marinette Yachts, and they MUST be non-metallic.
The first step is to remove all the linkages and stuffing boxes, after which the rudders should drop right down with a minor push. The boat needs to be elevated enough for the rudder AND the post to come out, so if you’re planning to do this, be sure to have the boat blocked nice and high. That means the height of the rudder PLUS the length of the shaft inside the boat.
Removing the old bushing was a royal pain until I learned about a “magic” bushing removal tool, which is pictured in the “Tools“ photo: a lathe chisel that is sharpened backwards (so it cuts from the outside). It does a great job of getting the remains of the bushing out of there. (I also used it for removing the prop shaft bushing someone had epoxied in.) The first step to removing the bushing is to saber saw through the rubber and bakelite material for the length of the bushing (about 3 inches). Make this cut in several locations about the bushing—say, every 45 degrees. With luck the bushing will disintegrate and, with a little help from the “magic” tool, the rest will come right out.
Next comes cleaning the inside of the pipe, so the new bushing will go in without hanging up. I used a one inch drum sander for this task, complete with an extension shaft to get way down inside the pipe. The “Go gage” show in the “Tools” photo is used to ensure there are no obstructions left to hang the bushing up. The OD of the gage is just under what the pipe ID should be, so if it goes through okay, the bushing will fit nicely. Finally, one of the bushings had so corroded the aluminum pipe that the bushing was too loose, so I applied some PC-7 marine epoxy (Ace or True Value Hardware) to keep it in place.
Note: All of the tools shown in the photo are available, free of charge, to anyone doing this repair. Just pay the shipping costs, both ways.
The Tools Used in the Repair
The Port Rudder Linkage
Another View of the Port Rudder Linkage
Look Out! Note the Crack in the Rudder Tie Bar
The Stuffing Box Assembly
New Port Rudder Bushing in Place
The Port Rudder Linkage All Back Together
The Starboard Rudder Linkage All Back Together
Those Sloppy Morse Throttles
After many wrong turns and mistaken ideas, I finally discovered a way to fix those sloppy Morse throttles. The culprit is worn out plastic bushings. (See the below photo). The solution is to tighten the bushings up by inserting a .005 inch brass shim behind them. And don’t waste your time fixing the shifter side, for slop there doesn’t really matter.
On the second throttle I fixed, I had a tough time getting the shim and plastic bushing onto the lower arm. The steel bushing, that’s pressed onto the pot metal shaft, had a ridge worn in it that had to be sanded and filed away.
One more thing: The shift detent, which causes the lever to stay where it’s put (F-N-R) has an allen screw adjustment. The trick to adjusting it is to LOOSEN the allen screw, not to tighten it. Try it both ways and you’ll see what I mean.
Click for a Photo
Changing Raw Water Pump Impellers
This is a tough job on 'twins', and it's even tougher if you put the pump housing in backwards. (Ah-hem!) The impeller has to 'screw into the housing' in one direction as well. The below photo and diagram show how the parts go, but a smart mechanic marks the parts before taking them apart. (Ah-hem!) The impeller shown had at least three years running on it and was still good. Best to change them BEFORE they start throwing blades. If yours is chewed up, be sure to backflush the oil cooler, to remove the impeller pieces--or else the new one will be destroyed. (Thanks to Norm for the second photo below.)
Click for a Photo
Click for a Photo
Tool-less Throttle Adjusting
If you can't stand to have the throttle handles not being together at cruising speed this little trick is for you. The "spinner nut" allows one to adjust the throttle cable without tools. Note: It’s a # 10-32 thread.
Click for a Photo
Vee Belt Adjusting Tool
Here’s a nifty little tool for adjusting Vee belts that used to be available from J. C. Whitney. (I have yet to locate someone still making these things, but I'll keep trying.) The barrel of the tool expands as it’s turned to force the two pulleys (drive and alternator or water pump) further apart. You can also over-tighten the belts, so be careful.
Click for a Photo
Stuffing Box Wrenches
You need two of them to snug the nuts together, The one on the left in the below photo is homemade; the other is a plumber's tool that’s commonly available.
Click for a Photo
Higher Output Alternators
If you're sick of those old, under-performing alternators, then a rebuilt, high performance unit is the hot ticket. Unfortunately, the 50 amp circuit breaker Chrysler used, in series with the alternator output, is not up to the job. (That’s how I learned what those "50" amp relays were for.) When I could not find a suitable I used a 50 amp unit from NAPA ($30) and wired it in parallel to the stock breaker.
Click for a Photo
That Railing Mess
One of the curses of aluminum boats is corrosion where the railing posts are screwed to the deck. In the first photo the railing has been removed to reveal the usual mess below it. (The deck in this particular location had the usual "minor" paint blisters showing, and black crud had built up below the rubber gasket.) In the next photo the mess has been sanded down to bare metal. Note that corrosion is halfway through the deck in one spot! This was the worse case, but every post had some level of corrosion growing under it.
Click for a Photo
Click for a Photo
In the next photo, the aluminum step plate has been removed. Note that, though is a bit of corrosion near one of the screws, and some black crud hiding below it, there was none of the deep, ugly corrosion found under the railing posts. My conclusion: Those rubber gaskets are bad news!)
Click for a Photo
In the next photo, I'm installing aluminum rivets in 17/64 inch drilled holes. The homemade rivet setter in the left photo works great if there's room to swing the handle. When there isn't, a ratchet and grade 8 bolt and nuts have to do. Get several for they wear out.
Click for a Photo
In the last photo the aluminum rivets have been 'set' and 1/8 “ thick plastic washers are glued on top of them with silicone (since the washers are tough to locate under the posts unless they are glued in place.) A rubber gasket is NOT used, to prevent moisture trapped below the gasket setting up a corrosion cell.
Update: After 4 years, the railing bolts are all still nice and tight, and minimal corrosion has reappeared under the posts.
Click for a Photo
Those Oddball Thermostats
Shown below are the two sizes of thermostats commonly used in Chrysler marine engines. The large 'T-stat' on the right was used in the earlier engines (and cars/ trucks in the late '70s). The smaller 'T-stat' (on the left) has been epoxied and riveted to a stainless steel plate for use in the earlier engine. Why go to all that trouble? Those large, custom t-stats is shockingly expensive, and if the t-stat housing is rusted badly (around the t-stat, as often the case in old, RWCooled engines) water will pass the t-stat to delay warm up and proper temperature control.
Click for a Photo
Getting Water and Junk Out of the Gas
Most Marinettes have these Perko water separator/ filters. If yours needs draining, to remove water and crud, a small glass jar like this one is a great help. Remove the plug, drain the separator, then let the contents sit for a few moments. (Note the water and crud in the bottom of the jar in the photo.) Be sure to use teflon tape on the threads of the plug when you reinstall it. And take it easy tightening that plug or you might wrench the housing loose from the wooden blocks.
Click for a Photo
Where to look for a potential troublemaker; a bad ballast resistor.
Most Chrysler engines use a ballast resistor. If it burns out the engine will start as you crank it, then stall the instant you let go of the ignition switch. Also, the connectors can "fall off" and kill the engine. Better check yours.
Note: Older spark modules used 5 pins; newer ones use only 4. Both work the same--I have one of each on my boat. The fifth pin and the other circuit on the ballast resistor was put there in an exercise in over-engineering by Chrysler, who were famous for such antics.
Click for a Photo
An Additional, Stern Drain Plug
During winter lay up water will collect in the stern when the boat is blocked bow high. The threat of freeze damage forced me to add an extra drain plug here.
Click for a Photo
Changing Oil the Neat and Easy Way
Here’s a 'neat' (literally) way to change engine oil using an old propane tank. You can get these for nothing since the older ones are now illegal. One of your engines (with twins, or a nearby car or truck) is used as a vacuum pump. I use the PVC fitting on the carb for my vacuum source. A 'Tee fitting' in the tank allows air to exit while oil flows to the bottom of the tank through a length of pipe. All you need is a few common fittings, some Ľ inch steel brake tube (that you poke down the oil checking tube hole) and some 3/8 inch hoses for vacuum and oil. You’ll need to unscrew the dipstick fitting at the block to get the tubing down into the oil pan. I also use this rig to suck the oil out of the old filter before disposing of it, avoiding another mess.
Click for a Photo
My Many Battles With Water Getting into the Bilge
There’s some places where I absolutely hate water—like in the cabin, bilge, etc. Below is a photo of a good way to keep water on the cockpit floor from draining into the bilge. These 1.5 x 1/8 inch aluminum strips are sealed to the floor with 3M 5200 to act like a dam.
Click for a Photo
In the next photo, a homemade rain gutter (1 inch aluminum channel) keeps water out of the salon and cockpit areas. (For some reason Marinette omitted these--a major mistake.) The 1/8 inch thick aluminum “deflectors” at the ends were designed and tested the hard way, during a rainstorm! The trick is to aim the water so it falls harmlessly onto the walkway. The rain gutters Marinette installed atop of the side scoops also need to be modified. (Experiment with a hose and you’ll see what I mean--water flows out of them and right onto the cockpit floor.) I plugged the rear of the rain gutter with silicone, then drilled holes in the bottom. Water now falls onto the walkway instead of flooding the cockpit area.
Click for a Photo
Note: This modification was made on a Sedan. Not sure it’s applicable to the Express or Fisherman models.
Prop Shaft Removal Tools and Techniques
Removal of your prop shafts is not a job to look forward to, but the homemade puller shown below was a great help. Since the space between the flanges is tight, the length of the puller bolt is critical. Better have several different length bolts with you. Also, when you're nearly there, I have to use a 1/2 socket as a spacer to get the hub free in that last, frustrating amount of travel. A bit of additional space would have been nice here!
Click for a Photo
In the below photo, a prop shaft flange is about to be removed. On Marinettes, it’s important to replace aged rubber hoses that connect the packing boxes to the shaft logs. Should one of these hoses fail, enough water could enter that the boat to sink it. And no, your bilge pump could never keep up with a leak that huge.
Click for a Photo
In this photo the puller is in place on the port flange. Note how little room one has to swing a wrench! By the way, I now use a box/ open end wrench instead of the knucklebuster shown.
Click for a Photo
In this photo the starboard flange is finally off (thank heaven!) and the shaft log is exposed. Note the buildup of corrosion on the inside.
Click for a Photo
The components of a Marinette stuffing box assembly {left to right} are shown: The rubber hose that connects the "shaft log" (a pipe welded to the hull) to the stuffing box assembly, the bronze gland, the lock nut, the packing rings (1/4 inch for 1 1/4 inch shafts), and the gland nut. Contrary to most stuffing box designs, the packing rings go inside the gland nut. This is a 1 1/4 inch shaft, but other sizes are similar (but use different size packing rings).
Click for a Photo
A close up shot of a Marinette packing gland nut. Since the packing is placed inside the gland nut, the locking nut MUST be tightened to the gland nut to prevent the assembly from rotating along with the shaft. On the starboard side, the packing gland nut could back right off (in forward), flooding the boat with water; on the port side it could tighten up and burn up the shaft! So, be sure you lock those two nuts tightly together.
Click for a Photo
Here's a shot of the assembly all back together again. Important things to check: 1. Are the set screws (in the flange) seated in those dimples drilled in the shaft? (If not, the shaft could back out of the flange in reverse.) 2. Is the bronze packing gland assembly and aluminum shaft log touching? (They must not touch.) 3. Is the locking nut tightened against the gland nut, locking the gland nut in place? 4. Is there an open circuit between the transmission side flange and the shaft? (There should be no electrical continuity between the shaft and the hull.)
Click for a Photo
The Battle Against Corrosion:
A Possible Way to Reduce the Corrosion Mess Around the Railings
Nearly every Marinette goes through this: corrosion blisters appear on the deck surface near the stainless railing posts. The railings are then removed, the paint sanded to remove the corrosion, the deck repainted, and the railings reinstalled--but it doesn't seem to matter how carefully the repair was done, or if a sealer was used on the screw threads, for the mess will come back in a few years.
A successful approach is to use aluminum rivets to hold the railings in place. The idea is allow the easily-replaced rivets to corrode instead of the deck. The below photo shows the rivets installed in a test piece of scrap aluminum with a Marinette handrailing post attached. The holding strength of the rivets is excellent. A 17/64 inch (just a fraction over 1/4 ") hole is required for them--just the ticket for those already stripped out screw holes.
Note: After 4 years, the rivets have held tightly, and under railing post corrosion has been minimal.
The drawing below the photo is of a homemade installation tool. Hold the 'static' piece, to keep the rivet from rotating, and put about two turns on the rivet with the "nut" (that doesn't strip like a hex nut). A socket head allen bolt is the only high strength bolt I could find in this small size. A regular nut and bolt strips way too easily. Oh, better buy several of each for they wear out quickly.
Note: You can also buy a rivet gun with adapters to set the rivets. I honestly haven't tried it this way, but it's got to be an improvement.
Click for a Photo
Click for a Photo
Corrosion Caused by a Lack of Proper Maintenance
Needless to say, my first sight of this mess was a nasty shock! The damage is confined to the starboard prop area--the port side looks pretty good. How this happened is a mystery--perhaps something got jammed in the prop and it flailed away at the bottom paint (that was not properly applied in the "repair")? Or, perhaps some boob used a bronze-shell cutlass bearing in the strut? Either way, I aged a decade or so upon seeing this mess! Much epoxy putty later it's now flat and smooth again, and it has not caused any trouble after 4 years. Alternatively I could have hired someone to MIG weld the area back to solid aluminum. The bottom line: Sandblasting and proper repainting of this 1985 era hull, years ago, would have prevented this horror scene.
Click for a Photo
Here's an even worse disaster, this time on Keith's 1974, 28 footer. (Keith sandblasted the ENTIRE hull, from gunnel to gunnel, with a 5 hp. potable compressor! That's called dedication.) This was the worst spot in the photos he sent me but, unfortunately, it wasn't the only one. Again, the lack of a complete 'bottom job' (strip to bare metal and redue) after years of usage resulted in the bare metal spots that caused this crevice corrosion mess.
Click for a Photo
Homemade Galvanic Meter
This portable corrosion meter came with my boat since the Capac probe stopped working long ago. The analog meter that was in the box died when it fell overboard one day (don’t ask!), so I replaced it with a digital meter. The cables, for the probe and ground clip, are soldered to the meter leads and strain-relieved inside the box. If your Capac probe has failed, probes such as this can be purchased for 70 to 80 bucks. The meter cost me $4 at Harbor Freight. Buy a box from Radio Shack, along with some cable and a ground clamp, and you’re in good shape. Accuracy of the readings is better than the original Capac setup (whose needle tends to stick). And you can be a hero at your marina by testing other people's boat (long as your marina guys don't mind, or catch you).
Click for a Photo
"Hey, what are those funky looking things?"
This 'loaf of bread' is a magnesium anode, and it sure confuses lots of folks. It is bolted to the trim tab such that it does not interfere with its movement via two, 5/16 bolts threaded into the magnesium from below.
Note: This is for FRESH WATER boats only! Magnesium produces way too much voltage in salt water.
Click for a Photo
"Now, that's a guppy!" (Think of Crocodile Dundee saying this)
This little beauty alone adds 0.15 volts to my galvanic protection system. With a guppy added to mine the readings are too high, but it’s nice to have that option.
Click for a Photo
Protective Zincs in Your Heat Exchangers
Many people don't know this, but there's a zinc element that keeps the tubes of these expensive heat exchangers from rotting out. With replacement costs hovering in the 400 to 600 dollar range, one should replace these zincs on a regular basis. The drain plug in the bottom contains the zinc.
Click for a Photo
Click for a Photo
My Love of Boating in Photos:
The below photos reveal this better than anything I could say. This photo was taken at our old slip. That Great Blue Herron makes its food foray up the bank to the left every evening.
Click for a Photo
Night falls on the Bohemia River.
Click for a Photo
In this photo, night has spectacularly fallen over the Wye River, where we were anchored. Ah, to be there right now!
Click for a Photo
In the below shots we’re cruising the Bush River
Click for a Photo
Note how straight a course the "Admiral" is holding. Not bad, eh?
Click for a Photo
What is it about sunsets and sunrises that excite the imagination? In this photo, the sun is rising over the Chesapeake Bay, at Still Pond.
Click for a Photo
What is it about sunsets and sunrises that excite the imagination? In this photo, the sun is rising over the Chesapeake Bay, at Still Pond.
Click for a Photo
Changing Rudder Bushings
This repair pertains to twin engined Marinettes, but the single screw models are similar. On my 1985, the port rudder was very sloppy in the bearings after 20 years of use. The starboard side—that doesn’t do as much work (the linkage comes in on the port side)—was in good shape. New bushings are available from Marinette Yachts, and they MUST be non-metallic.
The first step is to remove all the linkages and stuffing boxes, after which the rudders should drop right down with a minor push. The boat needs to be elevated enough for the rudder AND the post to come out, so if you’re planning to do this, be sure to have the boat blocked nice and high. That means the height of the rudder PLUS the length of the shaft inside the boat.
Removing the old bushing was a royal pain until I learned about a “magic” bushing removal tool, which is pictured in the “Tools“ photo: a lathe chisel that is sharpened backwards (so it cuts from the outside). It does a great job of getting the remains of the bushing out of there. (I also used it for removing the prop shaft bushing someone had epoxied in.) The first step to removing the bushing is to saber saw through the rubber and bakelite material for the length of the bushing (about 3 inches). Make this cut in several locations about the bushing—say, every 45 degrees. With luck the bushing will disintegrate and, with a little help from the “magic” tool, the rest will come right out.
Next comes cleaning the inside of the pipe, so the new bushing will go in without hanging up. I used a one inch drum sander for this task, complete with an extension shaft to get way down inside the pipe. The “Go gage” show in the “Tools” photo is used to ensure there are no obstructions left to hang the bushing up. The OD of the gage is just under what the pipe ID should be, so if it goes through okay, the bushing will fit nicely. Finally, one of the bushings had so corroded the aluminum pipe that the bushing was too loose, so I applied some PC-7 marine epoxy (Ace or True Value Hardware) to keep it in place.
Note: All of the tools shown in the photo are available, free of charge, to anyone doing this repair. Just pay the shipping costs, both ways.
The Tools Used in the Repair
The Port Rudder Linkage
Another View of the Port Rudder Linkage
Look Out! Note the Crack in the Rudder Tie Bar
The Stuffing Box Assembly
New Port Rudder Bushing in Place
The Port Rudder Linkage All Back Together
The Starboard Rudder Linkage All Back Together
Those Sloppy Morse Throttles
After many wrong turns and mistaken ideas, I finally discovered a way to fix those sloppy Morse throttles. The culprit is worn out plastic bushings. (See the below photo). The solution is to tighten the bushings up by inserting a .005 inch brass shim behind them. And don’t waste your time fixing the shifter side, for slop there doesn’t really matter.
On the second throttle I fixed, I had a tough time getting the shim and plastic bushing onto the lower arm. The steel bushing, that’s pressed onto the pot metal shaft, had a ridge worn in it that had to be sanded and filed away.
One more thing: The shift detent, which causes the lever to stay where it’s put (F-N-R) has an allen screw adjustment. The trick to adjusting it is to LOOSEN the allen screw, not to tighten it. Try it both ways and you’ll see what I mean.
Click for a Photo
Changing Raw Water Pump Impellers
This is a tough job on 'twins', and it's even tougher if you put the pump housing in backwards. (Ah-hem!) The impeller has to 'screw into the housing' in one direction as well. The below photo and diagram show how the parts go, but a smart mechanic marks the parts before taking them apart. (Ah-hem!) The impeller shown had at least three years running on it and was still good. Best to change them BEFORE they start throwing blades. If yours is chewed up, be sure to backflush the oil cooler, to remove the impeller pieces--or else the new one will be destroyed. (Thanks to Norm for the second photo below.)
Click for a Photo
Click for a Photo
Tool-less Throttle Adjusting
If you can't stand to have the throttle handles not being together at cruising speed this little trick is for you. The "spinner nut" allows one to adjust the throttle cable without tools. Note: It’s a # 10-32 thread.
Click for a Photo
Vee Belt Adjusting Tool
Here’s a nifty little tool for adjusting Vee belts that used to be available from J. C. Whitney. (I have yet to locate someone still making these things, but I'll keep trying.) The barrel of the tool expands as it’s turned to force the two pulleys (drive and alternator or water pump) further apart. You can also over-tighten the belts, so be careful.
Click for a Photo
Stuffing Box Wrenches
You need two of them to snug the nuts together, The one on the left in the below photo is homemade; the other is a plumber's tool that’s commonly available.
Click for a Photo
Higher Output Alternators
If you're sick of those old, under-performing alternators, then a rebuilt, high performance unit is the hot ticket. Unfortunately, the 50 amp circuit breaker Chrysler used, in series with the alternator output, is not up to the job. (That’s how I learned what those "50" amp relays were for.) When I could not find a suitable I used a 50 amp unit from NAPA ($30) and wired it in parallel to the stock breaker.
Click for a Photo
That Railing Mess
One of the curses of aluminum boats is corrosion where the railing posts are screwed to the deck. In the first photo the railing has been removed to reveal the usual mess below it. (The deck in this particular location had the usual "minor" paint blisters showing, and black crud had built up below the rubber gasket.) In the next photo the mess has been sanded down to bare metal. Note that corrosion is halfway through the deck in one spot! This was the worse case, but every post had some level of corrosion growing under it.
Click for a Photo
Click for a Photo
In the next photo, the aluminum step plate has been removed. Note that, though is a bit of corrosion near one of the screws, and some black crud hiding below it, there was none of the deep, ugly corrosion found under the railing posts. My conclusion: Those rubber gaskets are bad news!)
Click for a Photo
In the next photo, I'm installing aluminum rivets in 17/64 inch drilled holes. The homemade rivet setter in the left photo works great if there's room to swing the handle. When there isn't, a ratchet and grade 8 bolt and nuts have to do. Get several for they wear out.
Click for a Photo
In the last photo the aluminum rivets have been 'set' and 1/8 “ thick plastic washers are glued on top of them with silicone (since the washers are tough to locate under the posts unless they are glued in place.) A rubber gasket is NOT used, to prevent moisture trapped below the gasket setting up a corrosion cell.
Update: After 4 years, the railing bolts are all still nice and tight, and minimal corrosion has reappeared under the posts.
Click for a Photo
Those Oddball Thermostats
Shown below are the two sizes of thermostats commonly used in Chrysler marine engines. The large 'T-stat' on the right was used in the earlier engines (and cars/ trucks in the late '70s). The smaller 'T-stat' (on the left) has been epoxied and riveted to a stainless steel plate for use in the earlier engine. Why go to all that trouble? Those large, custom t-stats is shockingly expensive, and if the t-stat housing is rusted badly (around the t-stat, as often the case in old, RWCooled engines) water will pass the t-stat to delay warm up and proper temperature control.
Click for a Photo
Getting Water and Junk Out of the Gas
Most Marinettes have these Perko water separator/ filters. If yours needs draining, to remove water and crud, a small glass jar like this one is a great help. Remove the plug, drain the separator, then let the contents sit for a few moments. (Note the water and crud in the bottom of the jar in the photo.) Be sure to use teflon tape on the threads of the plug when you reinstall it. And take it easy tightening that plug or you might wrench the housing loose from the wooden blocks.
Click for a Photo
Where to look for a potential troublemaker; a bad ballast resistor.
Most Chrysler engines use a ballast resistor. If it burns out the engine will start as you crank it, then stall the instant you let go of the ignition switch. Also, the connectors can "fall off" and kill the engine. Better check yours.
Note: Older spark modules used 5 pins; newer ones use only 4. Both work the same--I have one of each on my boat. The fifth pin and the other circuit on the ballast resistor was put there in an exercise in over-engineering by Chrysler, who were famous for such antics.
Click for a Photo
An Additional, Stern Drain Plug
During winter lay up water will collect in the stern when the boat is blocked bow high. The threat of freeze damage forced me to add an extra drain plug here.
Click for a Photo
Changing Oil the Neat and Easy Way
Here’s a 'neat' (literally) way to change engine oil using an old propane tank. You can get these for nothing since the older ones are now illegal. One of your engines (with twins, or a nearby car or truck) is used as a vacuum pump. I use the PVC fitting on the carb for my vacuum source. A 'Tee fitting' in the tank allows air to exit while oil flows to the bottom of the tank through a length of pipe. All you need is a few common fittings, some Ľ inch steel brake tube (that you poke down the oil checking tube hole) and some 3/8 inch hoses for vacuum and oil. You’ll need to unscrew the dipstick fitting at the block to get the tubing down into the oil pan. I also use this rig to suck the oil out of the old filter before disposing of it, avoiding another mess.
Click for a Photo
My Many Battles With Water Getting into the Bilge
There’s some places where I absolutely hate water—like in the cabin, bilge, etc. Below is a photo of a good way to keep water on the cockpit floor from draining into the bilge. These 1.5 x 1/8 inch aluminum strips are sealed to the floor with 3M 5200 to act like a dam.
Click for a Photo
In the next photo, a homemade rain gutter (1 inch aluminum channel) keeps water out of the salon and cockpit areas. (For some reason Marinette omitted these--a major mistake.) The 1/8 inch thick aluminum “deflectors” at the ends were designed and tested the hard way, during a rainstorm! The trick is to aim the water so it falls harmlessly onto the walkway. The rain gutters Marinette installed atop of the side scoops also need to be modified. (Experiment with a hose and you’ll see what I mean--water flows out of them and right onto the cockpit floor.) I plugged the rear of the rain gutter with silicone, then drilled holes in the bottom. Water now falls onto the walkway instead of flooding the cockpit area.
Click for a Photo
Note: This modification was made on a Sedan. Not sure it’s applicable to the Express or Fisherman models.
Prop Shaft Removal Tools and Techniques
Removal of your prop shafts is not a job to look forward to, but the homemade puller shown below was a great help. Since the space between the flanges is tight, the length of the puller bolt is critical. Better have several different length bolts with you. Also, when you're nearly there, I have to use a 1/2 socket as a spacer to get the hub free in that last, frustrating amount of travel. A bit of additional space would have been nice here!
Click for a Photo
In the below photo, a prop shaft flange is about to be removed. On Marinettes, it’s important to replace aged rubber hoses that connect the packing boxes to the shaft logs. Should one of these hoses fail, enough water could enter that the boat to sink it. And no, your bilge pump could never keep up with a leak that huge.
Click for a Photo
In this photo the puller is in place on the port flange. Note how little room one has to swing a wrench! By the way, I now use a box/ open end wrench instead of the knucklebuster shown.
Click for a Photo
In this photo the starboard flange is finally off (thank heaven!) and the shaft log is exposed. Note the buildup of corrosion on the inside.
Click for a Photo
The components of a Marinette stuffing box assembly {left to right} are shown: The rubber hose that connects the "shaft log" (a pipe welded to the hull) to the stuffing box assembly, the bronze gland, the lock nut, the packing rings (1/4 inch for 1 1/4 inch shafts), and the gland nut. Contrary to most stuffing box designs, the packing rings go inside the gland nut. This is a 1 1/4 inch shaft, but other sizes are similar (but use different size packing rings).
Click for a Photo
A close up shot of a Marinette packing gland nut. Since the packing is placed inside the gland nut, the locking nut MUST be tightened to the gland nut to prevent the assembly from rotating along with the shaft. On the starboard side, the packing gland nut could back right off (in forward), flooding the boat with water; on the port side it could tighten up and burn up the shaft! So, be sure you lock those two nuts tightly together.
Click for a Photo
Here's a shot of the assembly all back together again. Important things to check: 1. Are the set screws (in the flange) seated in those dimples drilled in the shaft? (If not, the shaft could back out of the flange in reverse.) 2. Is the bronze packing gland assembly and aluminum shaft log touching? (They must not touch.) 3. Is the locking nut tightened against the gland nut, locking the gland nut in place? 4. Is there an open circuit between the transmission side flange and the shaft? (There should be no electrical continuity between the shaft and the hull.)
Click for a Photo
The Battle Against Corrosion:
A Possible Way to Reduce the Corrosion Mess Around the Railings
Nearly every Marinette goes through this: corrosion blisters appear on the deck surface near the stainless railing posts. The railings are then removed, the paint sanded to remove the corrosion, the deck repainted, and the railings reinstalled--but it doesn't seem to matter how carefully the repair was done, or if a sealer was used on the screw threads, for the mess will come back in a few years.
A successful approach is to use aluminum rivets to hold the railings in place. The idea is allow the easily-replaced rivets to corrode instead of the deck. The below photo shows the rivets installed in a test piece of scrap aluminum with a Marinette handrailing post attached. The holding strength of the rivets is excellent. A 17/64 inch (just a fraction over 1/4 ") hole is required for them--just the ticket for those already stripped out screw holes.
Note: After 4 years, the rivets have held tightly, and under railing post corrosion has been minimal.
The drawing below the photo is of a homemade installation tool. Hold the 'static' piece, to keep the rivet from rotating, and put about two turns on the rivet with the "nut" (that doesn't strip like a hex nut). A socket head allen bolt is the only high strength bolt I could find in this small size. A regular nut and bolt strips way too easily. Oh, better buy several of each for they wear out quickly.
Note: You can also buy a rivet gun with adapters to set the rivets. I honestly haven't tried it this way, but it's got to be an improvement.
Click for a Photo
Click for a Photo
Corrosion Caused by a Lack of Proper Maintenance
Needless to say, my first sight of this mess was a nasty shock! The damage is confined to the starboard prop area--the port side looks pretty good. How this happened is a mystery--perhaps something got jammed in the prop and it flailed away at the bottom paint (that was not properly applied in the "repair")? Or, perhaps some boob used a bronze-shell cutlass bearing in the strut? Either way, I aged a decade or so upon seeing this mess! Much epoxy putty later it's now flat and smooth again, and it has not caused any trouble after 4 years. Alternatively I could have hired someone to MIG weld the area back to solid aluminum. The bottom line: Sandblasting and proper repainting of this 1985 era hull, years ago, would have prevented this horror scene.
Click for a Photo
Here's an even worse disaster, this time on Keith's 1974, 28 footer. (Keith sandblasted the ENTIRE hull, from gunnel to gunnel, with a 5 hp. potable compressor! That's called dedication.) This was the worst spot in the photos he sent me but, unfortunately, it wasn't the only one. Again, the lack of a complete 'bottom job' (strip to bare metal and redue) after years of usage resulted in the bare metal spots that caused this crevice corrosion mess.
Click for a Photo
Homemade Galvanic Meter
This portable corrosion meter came with my boat since the Capac probe stopped working long ago. The analog meter that was in the box died when it fell overboard one day (don’t ask!), so I replaced it with a digital meter. The cables, for the probe and ground clip, are soldered to the meter leads and strain-relieved inside the box. If your Capac probe has failed, probes such as this can be purchased for 70 to 80 bucks. The meter cost me $4 at Harbor Freight. Buy a box from Radio Shack, along with some cable and a ground clamp, and you’re in good shape. Accuracy of the readings is better than the original Capac setup (whose needle tends to stick). And you can be a hero at your marina by testing other people's boat (long as your marina guys don't mind, or catch you).
Click for a Photo
"Hey, what are those funky looking things?"
This 'loaf of bread' is a magnesium anode, and it sure confuses lots of folks. It is bolted to the trim tab such that it does not interfere with its movement via two, 5/16 bolts threaded into the magnesium from below.
Note: This is for FRESH WATER boats only! Magnesium produces way too much voltage in salt water.
Click for a Photo
"Now, that's a guppy!" (Think of Crocodile Dundee saying this)
This little beauty alone adds 0.15 volts to my galvanic protection system. With a guppy added to mine the readings are too high, but it’s nice to have that option.
Click for a Photo
Protective Zincs in Your Heat Exchangers
Many people don't know this, but there's a zinc element that keeps the tubes of these expensive heat exchangers from rotting out. With replacement costs hovering in the 400 to 600 dollar range, one should replace these zincs on a regular basis. The drain plug in the bottom contains the zinc.
Click for a Photo
Click for a Photo
My Love of Boating in Photos:
The below photos reveal this better than anything I could say. This photo was taken at our old slip. That Great Blue Herron makes its food foray up the bank to the left every evening.
Click for a Photo
Night falls on the Bohemia River.
Click for a Photo
In this photo, night has spectacularly fallen over the Wye River, where we were anchored. Ah, to be there right now!
Click for a Photo
In the below shots we’re cruising the Bush River
Click for a Photo
Note how straight a course the "Admiral" is holding. Not bad, eh?
Click for a Photo
What is it about sunsets and sunrises that excite the imagination? In this photo, the sun is rising over the Chesapeake Bay, at Still Pond.
Click for a Photo
What is it about sunsets and sunrises that excite the imagination? In this photo, the sun is rising over the Chesapeake Bay, at Still Pond.
Click for a Photo
Click for a Photo
Tool-less Throttle Adjusting
If you can't stand to have the throttle handles not being together at cruising speed this little trick is for you. The "spinner nut" allows one to adjust the throttle cable without tools. Note: It’s a # 10-32 thread.
Click for a Photo
Vee Belt Adjusting Tool
Here’s a nifty little tool for adjusting Vee belts that used to be available from J. C. Whitney. (I have yet to locate someone still making these things, but I'll keep trying.) The barrel of the tool expands as it’s turned to force the two pulleys (drive and alternator or water pump) further apart. You can also over-tighten the belts, so be careful.
Click for a Photo
Stuffing Box Wrenches
You need two of them to snug the nuts together, The one on the left in the below photo is homemade; the other is a plumber's tool that’s commonly available.
Click for a Photo
Higher Output Alternators
If you're sick of those old, under-performing alternators, then a rebuilt, high performance unit is the hot ticket. Unfortunately, the 50 amp circuit breaker Chrysler used, in series with the alternator output, is not up to the job. (That’s how I learned what those "50" amp relays were for.) When I could not find a suitable I used a 50 amp unit from NAPA ($30) and wired it in parallel to the stock breaker.
Click for a Photo
That Railing Mess
One of the curses of aluminum boats is corrosion where the railing posts are screwed to the deck. In the first photo the railing has been removed to reveal the usual mess below it. (The deck in this particular location had the usual "minor" paint blisters showing, and black crud had built up below the rubber gasket.) In the next photo the mess has been sanded down to bare metal. Note that corrosion is halfway through the deck in one spot! This was the worse case, but every post had some level of corrosion growing under it.
Click for a Photo
Click for a Photo
In the next photo, the aluminum step plate has been removed. Note that, though is a bit of corrosion near one of the screws, and some black crud hiding below it, there was none of the deep, ugly corrosion found under the railing posts. My conclusion: Those rubber gaskets are bad news!)
Click for a Photo
In the next photo, I'm installing aluminum rivets in 17/64 inch drilled holes. The homemade rivet setter in the left photo works great if there's room to swing the handle. When there isn't, a ratchet and grade 8 bolt and nuts have to do. Get several for they wear out.
Click for a Photo
In the last photo the aluminum rivets have been 'set' and 1/8 “ thick plastic washers are glued on top of them with silicone (since the washers are tough to locate under the posts unless they are glued in place.) A rubber gasket is NOT used, to prevent moisture trapped below the gasket setting up a corrosion cell.
Update: After 4 years, the railing bolts are all still nice and tight, and minimal corrosion has reappeared under the posts.
Click for a Photo
Those Oddball Thermostats
Shown below are the two sizes of thermostats commonly used in Chrysler marine engines. The large 'T-stat' on the right was used in the earlier engines (and cars/ trucks in the late '70s). The smaller 'T-stat' (on the left) has been epoxied and riveted to a stainless steel plate for use in the earlier engine. Why go to all that trouble? Those large, custom t-stats is shockingly expensive, and if the t-stat housing is rusted badly (around the t-stat, as often the case in old, RWCooled engines) water will pass the t-stat to delay warm up and proper temperature control.
Click for a Photo
Getting Water and Junk Out of the Gas
Most Marinettes have these Perko water separator/ filters. If yours needs draining, to remove water and crud, a small glass jar like this one is a great help. Remove the plug, drain the separator, then let the contents sit for a few moments. (Note the water and crud in the bottom of the jar in the photo.) Be sure to use teflon tape on the threads of the plug when you reinstall it. And take it easy tightening that plug or you might wrench the housing loose from the wooden blocks.
Click for a Photo
Where to look for a potential troublemaker; a bad ballast resistor.
Most Chrysler engines use a ballast resistor. If it burns out the engine will start as you crank it, then stall the instant you let go of the ignition switch. Also, the connectors can "fall off" and kill the engine. Better check yours.
Note: Older spark modules used 5 pins; newer ones use only 4. Both work the same--I have one of each on my boat. The fifth pin and the other circuit on the ballast resistor was put there in an exercise in over-engineering by Chrysler, who were famous for such antics.
Click for a Photo
An Additional, Stern Drain Plug
During winter lay up water will collect in the stern when the boat is blocked bow high. The threat of freeze damage forced me to add an extra drain plug here.
Click for a Photo
Changing Oil the Neat and Easy Way
Here’s a 'neat' (literally) way to change engine oil using an old propane tank. You can get these for nothing since the older ones are now illegal. One of your engines (with twins, or a nearby car or truck) is used as a vacuum pump. I use the PVC fitting on the carb for my vacuum source. A 'Tee fitting' in the tank allows air to exit while oil flows to the bottom of the tank through a length of pipe. All you need is a few common fittings, some Ľ inch steel brake tube (that you poke down the oil checking tube hole) and some 3/8 inch hoses for vacuum and oil. You’ll need to unscrew the dipstick fitting at the block to get the tubing down into the oil pan. I also use this rig to suck the oil out of the old filter before disposing of it, avoiding another mess.
Click for a Photo
My Many Battles With Water Getting into the Bilge
There’s some places where I absolutely hate water—like in the cabin, bilge, etc. Below is a photo of a good way to keep water on the cockpit floor from draining into the bilge. These 1.5 x 1/8 inch aluminum strips are sealed to the floor with 3M 5200 to act like a dam.
Click for a Photo
In the next photo, a homemade rain gutter (1 inch aluminum channel) keeps water out of the salon and cockpit areas. (For some reason Marinette omitted these--a major mistake.) The 1/8 inch thick aluminum “deflectors” at the ends were designed and tested the hard way, during a rainstorm! The trick is to aim the water so it falls harmlessly onto the walkway. The rain gutters Marinette installed atop of the side scoops also need to be modified. (Experiment with a hose and you’ll see what I mean--water flows out of them and right onto the cockpit floor.) I plugged the rear of the rain gutter with silicone, then drilled holes in the bottom. Water now falls onto the walkway instead of flooding the cockpit area.
Click for a Photo
Note: This modification was made on a Sedan. Not sure it’s applicable to the Express or Fisherman models.
Prop Shaft Removal Tools and Techniques
Removal of your prop shafts is not a job to look forward to, but the homemade puller shown below was a great help. Since the space between the flanges is tight, the length of the puller bolt is critical. Better have several different length bolts with you. Also, when you're nearly there, I have to use a 1/2 socket as a spacer to get the hub free in that last, frustrating amount of travel. A bit of additional space would have been nice here!
Click for a Photo
In the below photo, a prop shaft flange is about to be removed. On Marinettes, it’s important to replace aged rubber hoses that connect the packing boxes to the shaft logs. Should one of these hoses fail, enough water could enter that the boat to sink it. And no, your bilge pump could never keep up with a leak that huge.
Click for a Photo
In this photo the puller is in place on the port flange. Note how little room one has to swing a wrench! By the way, I now use a box/ open end wrench instead of the knucklebuster shown.
Click for a Photo
In this photo the starboard flange is finally off (thank heaven!) and the shaft log is exposed. Note the buildup of corrosion on the inside.
Click for a Photo
The components of a Marinette stuffing box assembly {left to right} are shown: The rubber hose that connects the "shaft log" (a pipe welded to the hull) to the stuffing box assembly, the bronze gland, the lock nut, the packing rings (1/4 inch for 1 1/4 inch shafts), and the gland nut. Contrary to most stuffing box designs, the packing rings go inside the gland nut. This is a 1 1/4 inch shaft, but other sizes are similar (but use different size packing rings).
Click for a Photo
A close up shot of a Marinette packing gland nut. Since the packing is placed inside the gland nut, the locking nut MUST be tightened to the gland nut to prevent the assembly from rotating along with the shaft. On the starboard side, the packing gland nut could back right off (in forward), flooding the boat with water; on the port side it could tighten up and burn up the shaft! So, be sure you lock those two nuts tightly together.
Click for a Photo
Here's a shot of the assembly all back together again. Important things to check: 1. Are the set screws (in the flange) seated in those dimples drilled in the shaft? (If not, the shaft could back out of the flange in reverse.) 2. Is the bronze packing gland assembly and aluminum shaft log touching? (They must not touch.) 3. Is the locking nut tightened against the gland nut, locking the gland nut in place? 4. Is there an open circuit between the transmission side flange and the shaft? (There should be no electrical continuity between the shaft and the hull.)
Click for a Photo
The Battle Against Corrosion:
A Possible Way to Reduce the Corrosion Mess Around the Railings
Nearly every Marinette goes through this: corrosion blisters appear on the deck surface near the stainless railing posts. The railings are then removed, the paint sanded to remove the corrosion, the deck repainted, and the railings reinstalled--but it doesn't seem to matter how carefully the repair was done, or if a sealer was used on the screw threads, for the mess will come back in a few years.
A successful approach is to use aluminum rivets to hold the railings in place. The idea is allow the easily-replaced rivets to corrode instead of the deck. The below photo shows the rivets installed in a test piece of scrap aluminum with a Marinette handrailing post attached. The holding strength of the rivets is excellent. A 17/64 inch (just a fraction over 1/4 ") hole is required for them--just the ticket for those already stripped out screw holes.
Note: After 4 years, the rivets have held tightly, and under railing post corrosion has been minimal.
The drawing below the photo is of a homemade installation tool. Hold the 'static' piece, to keep the rivet from rotating, and put about two turns on the rivet with the "nut" (that doesn't strip like a hex nut). A socket head allen bolt is the only high strength bolt I could find in this small size. A regular nut and bolt strips way too easily. Oh, better buy several of each for they wear out quickly.
Note: You can also buy a rivet gun with adapters to set the rivets. I honestly haven't tried it this way, but it's got to be an improvement.
Click for a Photo
Click for a Photo
Corrosion Caused by a Lack of Proper Maintenance
Needless to say, my first sight of this mess was a nasty shock! The damage is confined to the starboard prop area--the port side looks pretty good. How this happened is a mystery--perhaps something got jammed in the prop and it flailed away at the bottom paint (that was not properly applied in the "repair")? Or, perhaps some boob used a bronze-shell cutlass bearing in the strut? Either way, I aged a decade or so upon seeing this mess! Much epoxy putty later it's now flat and smooth again, and it has not caused any trouble after 4 years. Alternatively I could have hired someone to MIG weld the area back to solid aluminum. The bottom line: Sandblasting and proper repainting of this 1985 era hull, years ago, would have prevented this horror scene.
Click for a Photo
Here's an even worse disaster, this time on Keith's 1974, 28 footer. (Keith sandblasted the ENTIRE hull, from gunnel to gunnel, with a 5 hp. potable compressor! That's called dedication.) This was the worst spot in the photos he sent me but, unfortunately, it wasn't the only one. Again, the lack of a complete 'bottom job' (strip to bare metal and redue) after years of usage resulted in the bare metal spots that caused this crevice corrosion mess.
Click for a Photo
Homemade Galvanic Meter
This portable corrosion meter came with my boat since the Capac probe stopped working long ago. The analog meter that was in the box died when it fell overboard one day (don’t ask!), so I replaced it with a digital meter. The cables, for the probe and ground clip, are soldered to the meter leads and strain-relieved inside the box. If your Capac probe has failed, probes such as this can be purchased for 70 to 80 bucks. The meter cost me $4 at Harbor Freight. Buy a box from Radio Shack, along with some cable and a ground clamp, and you’re in good shape. Accuracy of the readings is better than the original Capac setup (whose needle tends to stick). And you can be a hero at your marina by testing other people's boat (long as your marina guys don't mind, or catch you).
Click for a Photo
"Hey, what are those funky looking things?"
This 'loaf of bread' is a magnesium anode, and it sure confuses lots of folks. It is bolted to the trim tab such that it does not interfere with its movement via two, 5/16 bolts threaded into the magnesium from below.
Note: This is for FRESH WATER boats only! Magnesium produces way too much voltage in salt water.
Click for a Photo
"Now, that's a guppy!" (Think of Crocodile Dundee saying this)
This little beauty alone adds 0.15 volts to my galvanic protection system. With a guppy added to mine the readings are too high, but it’s nice to have that option.
Click for a Photo
Protective Zincs in Your Heat Exchangers
Many people don't know this, but there's a zinc element that keeps the tubes of these expensive heat exchangers from rotting out. With replacement costs hovering in the 400 to 600 dollar range, one should replace these zincs on a regular basis. The drain plug in the bottom contains the zinc.
Click for a Photo
Click for a Photo
My Love of Boating in Photos:
The below photos reveal this better than anything I could say. This photo was taken at our old slip. That Great Blue Herron makes its food foray up the bank to the left every evening.
Click for a Photo
Night falls on the Bohemia River.
Click for a Photo
In this photo, night has spectacularly fallen over the Wye River, where we were anchored. Ah, to be there right now!
Click for a Photo
In the below shots we’re cruising the Bush River
Click for a Photo
Note how straight a course the "Admiral" is holding. Not bad, eh?
Click for a Photo
What is it about sunsets and sunrises that excite the imagination? In this photo, the sun is rising over the Chesapeake Bay, at Still Pond.
Click for a Photo
What is it about sunsets and sunrises that excite the imagination? In this photo, the sun is rising over the Chesapeake Bay, at Still Pond.
Click for a Photo
Vee Belt Adjusting Tool
Here’s a nifty little tool for adjusting Vee belts that used to be available from J. C. Whitney. (I have yet to locate someone still making these things, but I'll keep trying.) The barrel of the tool expands as it’s turned to force the two pulleys (drive and alternator or water pump) further apart. You can also over-tighten the belts, so be careful.
Click for a Photo
Stuffing Box Wrenches
You need two of them to snug the nuts together, The one on the left in the below photo is homemade; the other is a plumber's tool that’s commonly available.
Click for a Photo
Higher Output Alternators
If you're sick of those old, under-performing alternators, then a rebuilt, high performance unit is the hot ticket. Unfortunately, the 50 amp circuit breaker Chrysler used, in series with the alternator output, is not up to the job. (That’s how I learned what those "50" amp relays were for.) When I could not find a suitable I used a 50 amp unit from NAPA ($30) and wired it in parallel to the stock breaker.
Click for a Photo
That Railing Mess
One of the curses of aluminum boats is corrosion where the railing posts are screwed to the deck. In the first photo the railing has been removed to reveal the usual mess below it. (The deck in this particular location had the usual "minor" paint blisters showing, and black crud had built up below the rubber gasket.) In the next photo the mess has been sanded down to bare metal. Note that corrosion is halfway through the deck in one spot! This was the worse case, but every post had some level of corrosion growing under it.
Click for a Photo
Click for a Photo
In the next photo, the aluminum step plate has been removed. Note that, though is a bit of corrosion near one of the screws, and some black crud hiding below it, there was none of the deep, ugly corrosion found under the railing posts. My conclusion: Those rubber gaskets are bad news!)
Click for a Photo
In the next photo, I'm installing aluminum rivets in 17/64 inch drilled holes. The homemade rivet setter in the left photo works great if there's room to swing the handle. When there isn't, a ratchet and grade 8 bolt and nuts have to do. Get several for they wear out.
Click for a Photo
In the last photo the aluminum rivets have been 'set' and 1/8 “ thick plastic washers are glued on top of them with silicone (since the washers are tough to locate under the posts unless they are glued in place.) A rubber gasket is NOT used, to prevent moisture trapped below the gasket setting up a corrosion cell.
Update: After 4 years, the railing bolts are all still nice and tight, and minimal corrosion has reappeared under the posts.
Click for a Photo
Those Oddball Thermostats
Shown below are the two sizes of thermostats commonly used in Chrysler marine engines. The large 'T-stat' on the right was used in the earlier engines (and cars/ trucks in the late '70s). The smaller 'T-stat' (on the left) has been epoxied and riveted to a stainless steel plate for use in the earlier engine. Why go to all that trouble? Those large, custom t-stats is shockingly expensive, and if the t-stat housing is rusted badly (around the t-stat, as often the case in old, RWCooled engines) water will pass the t-stat to delay warm up and proper temperature control.
Click for a Photo
Getting Water and Junk Out of the Gas
Most Marinettes have these Perko water separator/ filters. If yours needs draining, to remove water and crud, a small glass jar like this one is a great help. Remove the plug, drain the separator, then let the contents sit for a few moments. (Note the water and crud in the bottom of the jar in the photo.) Be sure to use teflon tape on the threads of the plug when you reinstall it. And take it easy tightening that plug or you might wrench the housing loose from the wooden blocks.
Click for a Photo
Where to look for a potential troublemaker; a bad ballast resistor.
Most Chrysler engines use a ballast resistor. If it burns out the engine will start as you crank it, then stall the instant you let go of the ignition switch. Also, the connectors can "fall off" and kill the engine. Better check yours.
Note: Older spark modules used 5 pins; newer ones use only 4. Both work the same--I have one of each on my boat. The fifth pin and the other circuit on the ballast resistor was put there in an exercise in over-engineering by Chrysler, who were famous for such antics.
Click for a Photo
An Additional, Stern Drain Plug
During winter lay up water will collect in the stern when the boat is blocked bow high. The threat of freeze damage forced me to add an extra drain plug here.
Click for a Photo
Changing Oil the Neat and Easy Way
Here’s a 'neat' (literally) way to change engine oil using an old propane tank. You can get these for nothing since the older ones are now illegal. One of your engines (with twins, or a nearby car or truck) is used as a vacuum pump. I use the PVC fitting on the carb for my vacuum source. A 'Tee fitting' in the tank allows air to exit while oil flows to the bottom of the tank through a length of pipe. All you need is a few common fittings, some Ľ inch steel brake tube (that you poke down the oil checking tube hole) and some 3/8 inch hoses for vacuum and oil. You’ll need to unscrew the dipstick fitting at the block to get the tubing down into the oil pan. I also use this rig to suck the oil out of the old filter before disposing of it, avoiding another mess.
Click for a Photo
My Many Battles With Water Getting into the Bilge
There’s some places where I absolutely hate water—like in the cabin, bilge, etc. Below is a photo of a good way to keep water on the cockpit floor from draining into the bilge. These 1.5 x 1/8 inch aluminum strips are sealed to the floor with 3M 5200 to act like a dam.
Click for a Photo
In the next photo, a homemade rain gutter (1 inch aluminum channel) keeps water out of the salon and cockpit areas. (For some reason Marinette omitted these--a major mistake.) The 1/8 inch thick aluminum “deflectors” at the ends were designed and tested the hard way, during a rainstorm! The trick is to aim the water so it falls harmlessly onto the walkway. The rain gutters Marinette installed atop of the side scoops also need to be modified. (Experiment with a hose and you’ll see what I mean--water flows out of them and right onto the cockpit floor.) I plugged the rear of the rain gutter with silicone, then drilled holes in the bottom. Water now falls onto the walkway instead of flooding the cockpit area.
Click for a Photo
Note: This modification was made on a Sedan. Not sure it’s applicable to the Express or Fisherman models.
Prop Shaft Removal Tools and Techniques
Removal of your prop shafts is not a job to look forward to, but the homemade puller shown below was a great help. Since the space between the flanges is tight, the length of the puller bolt is critical. Better have several different length bolts with you. Also, when you're nearly there, I have to use a 1/2 socket as a spacer to get the hub free in that last, frustrating amount of travel. A bit of additional space would have been nice here!
Click for a Photo
In the below photo, a prop shaft flange is about to be removed. On Marinettes, it’s important to replace aged rubber hoses that connect the packing boxes to the shaft logs. Should one of these hoses fail, enough water could enter that the boat to sink it. And no, your bilge pump could never keep up with a leak that huge.
Click for a Photo
In this photo the puller is in place on the port flange. Note how little room one has to swing a wrench! By the way, I now use a box/ open end wrench instead of the knucklebuster shown.
Click for a Photo
In this photo the starboard flange is finally off (thank heaven!) and the shaft log is exposed. Note the buildup of corrosion on the inside.
Click for a Photo
The components of a Marinette stuffing box assembly {left to right} are shown: The rubber hose that connects the "shaft log" (a pipe welded to the hull) to the stuffing box assembly, the bronze gland, the lock nut, the packing rings (1/4 inch for 1 1/4 inch shafts), and the gland nut. Contrary to most stuffing box designs, the packing rings go inside the gland nut. This is a 1 1/4 inch shaft, but other sizes are similar (but use different size packing rings).
Click for a Photo
A close up shot of a Marinette packing gland nut. Since the packing is placed inside the gland nut, the locking nut MUST be tightened to the gland nut to prevent the assembly from rotating along with the shaft. On the starboard side, the packing gland nut could back right off (in forward), flooding the boat with water; on the port side it could tighten up and burn up the shaft! So, be sure you lock those two nuts tightly together.
Click for a Photo
Here's a shot of the assembly all back together again. Important things to check: 1. Are the set screws (in the flange) seated in those dimples drilled in the shaft? (If not, the shaft could back out of the flange in reverse.) 2. Is the bronze packing gland assembly and aluminum shaft log touching? (They must not touch.) 3. Is the locking nut tightened against the gland nut, locking the gland nut in place? 4. Is there an open circuit between the transmission side flange and the shaft? (There should be no electrical continuity between the shaft and the hull.)
Click for a Photo
The Battle Against Corrosion:
A Possible Way to Reduce the Corrosion Mess Around the Railings
Nearly every Marinette goes through this: corrosion blisters appear on the deck surface near the stainless railing posts. The railings are then removed, the paint sanded to remove the corrosion, the deck repainted, and the railings reinstalled--but it doesn't seem to matter how carefully the repair was done, or if a sealer was used on the screw threads, for the mess will come back in a few years.
A successful approach is to use aluminum rivets to hold the railings in place. The idea is allow the easily-replaced rivets to corrode instead of the deck. The below photo shows the rivets installed in a test piece of scrap aluminum with a Marinette handrailing post attached. The holding strength of the rivets is excellent. A 17/64 inch (just a fraction over 1/4 ") hole is required for them--just the ticket for those already stripped out screw holes.
Note: After 4 years, the rivets have held tightly, and under railing post corrosion has been minimal.
The drawing below the photo is of a homemade installation tool. Hold the 'static' piece, to keep the rivet from rotating, and put about two turns on the rivet with the "nut" (that doesn't strip like a hex nut). A socket head allen bolt is the only high strength bolt I could find in this small size. A regular nut and bolt strips way too easily. Oh, better buy several of each for they wear out quickly.
Note: You can also buy a rivet gun with adapters to set the rivets. I honestly haven't tried it this way, but it's got to be an improvement.
Click for a Photo
Click for a Photo
Corrosion Caused by a Lack of Proper Maintenance
Needless to say, my first sight of this mess was a nasty shock! The damage is confined to the starboard prop area--the port side looks pretty good. How this happened is a mystery--perhaps something got jammed in the prop and it flailed away at the bottom paint (that was not properly applied in the "repair")? Or, perhaps some boob used a bronze-shell cutlass bearing in the strut? Either way, I aged a decade or so upon seeing this mess! Much epoxy putty later it's now flat and smooth again, and it has not caused any trouble after 4 years. Alternatively I could have hired someone to MIG weld the area back to solid aluminum. The bottom line: Sandblasting and proper repainting of this 1985 era hull, years ago, would have prevented this horror scene.
Click for a Photo
Here's an even worse disaster, this time on Keith's 1974, 28 footer. (Keith sandblasted the ENTIRE hull, from gunnel to gunnel, with a 5 hp. potable compressor! That's called dedication.) This was the worst spot in the photos he sent me but, unfortunately, it wasn't the only one. Again, the lack of a complete 'bottom job' (strip to bare metal and redue) after years of usage resulted in the bare metal spots that caused this crevice corrosion mess.
Click for a Photo
Homemade Galvanic Meter
This portable corrosion meter came with my boat since the Capac probe stopped working long ago. The analog meter that was in the box died when it fell overboard one day (don’t ask!), so I replaced it with a digital meter. The cables, for the probe and ground clip, are soldered to the meter leads and strain-relieved inside the box. If your Capac probe has failed, probes such as this can be purchased for 70 to 80 bucks. The meter cost me $4 at Harbor Freight. Buy a box from Radio Shack, along with some cable and a ground clamp, and you’re in good shape. Accuracy of the readings is better than the original Capac setup (whose needle tends to stick). And you can be a hero at your marina by testing other people's boat (long as your marina guys don't mind, or catch you).
Click for a Photo
"Hey, what are those funky looking things?"
This 'loaf of bread' is a magnesium anode, and it sure confuses lots of folks. It is bolted to the trim tab such that it does not interfere with its movement via two, 5/16 bolts threaded into the magnesium from below.
Note: This is for FRESH WATER boats only! Magnesium produces way too much voltage in salt water.
Click for a Photo
"Now, that's a guppy!" (Think of Crocodile Dundee saying this)
This little beauty alone adds 0.15 volts to my galvanic protection system. With a guppy added to mine the readings are too high, but it’s nice to have that option.
Click for a Photo
Protective Zincs in Your Heat Exchangers
Many people don't know this, but there's a zinc element that keeps the tubes of these expensive heat exchangers from rotting out. With replacement costs hovering in the 400 to 600 dollar range, one should replace these zincs on a regular basis. The drain plug in the bottom contains the zinc.
Click for a Photo
Click for a Photo
My Love of Boating in Photos:
The below photos reveal this better than anything I could say. This photo was taken at our old slip. That Great Blue Herron makes its food foray up the bank to the left every evening.
Click for a Photo
Night falls on the Bohemia River.
Click for a Photo
In this photo, night has spectacularly fallen over the Wye River, where we were anchored. Ah, to be there right now!
Click for a Photo
In the below shots we’re cruising the Bush River
Click for a Photo
Note how straight a course the "Admiral" is holding. Not bad, eh?
Click for a Photo
What is it about sunsets and sunrises that excite the imagination? In this photo, the sun is rising over the Chesapeake Bay, at Still Pond.
Click for a Photo
What is it about sunsets and sunrises that excite the imagination? In this photo, the sun is rising over the Chesapeake Bay, at Still Pond.
Click for a Photo
Higher Output Alternators
If you're sick of those old, under-performing alternators, then a rebuilt, high performance unit is the hot ticket. Unfortunately, the 50 amp circuit breaker Chrysler used, in series with the alternator output, is not up to the job. (That’s how I learned what those "50" amp relays were for.) When I could not find a suitable I used a 50 amp unit from NAPA ($30) and wired it in parallel to the stock breaker.
Click for a Photo
That Railing Mess
One of the curses of aluminum boats is corrosion where the railing posts are screwed to the deck. In the first photo the railing has been removed to reveal the usual mess below it. (The deck in this particular location had the usual "minor" paint blisters showing, and black crud had built up below the rubber gasket.) In the next photo the mess has been sanded down to bare metal. Note that corrosion is halfway through the deck in one spot! This was the worse case, but every post had some level of corrosion growing under it.
Click for a Photo
Click for a Photo
In the next photo, the aluminum step plate has been removed. Note that, though is a bit of corrosion near one of the screws, and some black crud hiding below it, there was none of the deep, ugly corrosion found under the railing posts. My conclusion: Those rubber gaskets are bad news!)
Click for a Photo
In the next photo, I'm installing aluminum rivets in 17/64 inch drilled holes. The homemade rivet setter in the left photo works great if there's room to swing the handle. When there isn't, a ratchet and grade 8 bolt and nuts have to do. Get several for they wear out.
Click for a Photo
In the last photo the aluminum rivets have been 'set' and 1/8 “ thick plastic washers are glued on top of them with silicone (since the washers are tough to locate under the posts unless they are glued in place.) A rubber gasket is NOT used, to prevent moisture trapped below the gasket setting up a corrosion cell.
Update: After 4 years, the railing bolts are all still nice and tight, and minimal corrosion has reappeared under the posts.
Click for a Photo
Those Oddball Thermostats
Shown below are the two sizes of thermostats commonly used in Chrysler marine engines. The large 'T-stat' on the right was used in the earlier engines (and cars/ trucks in the late '70s). The smaller 'T-stat' (on the left) has been epoxied and riveted to a stainless steel plate for use in the earlier engine. Why go to all that trouble? Those large, custom t-stats is shockingly expensive, and if the t-stat housing is rusted badly (around the t-stat, as often the case in old, RWCooled engines) water will pass the t-stat to delay warm up and proper temperature control.
Click for a Photo
Getting Water and Junk Out of the Gas
Most Marinettes have these Perko water separator/ filters. If yours needs draining, to remove water and crud, a small glass jar like this one is a great help. Remove the plug, drain the separator, then let the contents sit for a few moments. (Note the water and crud in the bottom of the jar in the photo.) Be sure to use teflon tape on the threads of the plug when you reinstall it. And take it easy tightening that plug or you might wrench the housing loose from the wooden blocks.
Click for a Photo
Where to look for a potential troublemaker; a bad ballast resistor.
Most Chrysler engines use a ballast resistor. If it burns out the engine will start as you crank it, then stall the instant you let go of the ignition switch. Also, the connectors can "fall off" and kill the engine. Better check yours.
Note: Older spark modules used 5 pins; newer ones use only 4. Both work the same--I have one of each on my boat. The fifth pin and the other circuit on the ballast resistor was put there in an exercise in over-engineering by Chrysler, who were famous for such antics.
Click for a Photo
An Additional, Stern Drain Plug
During winter lay up water will collect in the stern when the boat is blocked bow high. The threat of freeze damage forced me to add an extra drain plug here.
Click for a Photo
Changing Oil the Neat and Easy Way
Here’s a 'neat' (literally) way to change engine oil using an old propane tank. You can get these for nothing since the older ones are now illegal. One of your engines (with twins, or a nearby car or truck) is used as a vacuum pump. I use the PVC fitting on the carb for my vacuum source. A 'Tee fitting' in the tank allows air to exit while oil flows to the bottom of the tank through a length of pipe. All you need is a few common fittings, some Ľ inch steel brake tube (that you poke down the oil checking tube hole) and some 3/8 inch hoses for vacuum and oil. You’ll need to unscrew the dipstick fitting at the block to get the tubing down into the oil pan. I also use this rig to suck the oil out of the old filter before disposing of it, avoiding another mess.
Click for a Photo
My Many Battles With Water Getting into the Bilge
There’s some places where I absolutely hate water—like in the cabin, bilge, etc. Below is a photo of a good way to keep water on the cockpit floor from draining into the bilge. These 1.5 x 1/8 inch aluminum strips are sealed to the floor with 3M 5200 to act like a dam.
Click for a Photo
In the next photo, a homemade rain gutter (1 inch aluminum channel) keeps water out of the salon and cockpit areas. (For some reason Marinette omitted these--a major mistake.) The 1/8 inch thick aluminum “deflectors” at the ends were designed and tested the hard way, during a rainstorm! The trick is to aim the water so it falls harmlessly onto the walkway. The rain gutters Marinette installed atop of the side scoops also need to be modified. (Experiment with a hose and you’ll see what I mean--water flows out of them and right onto the cockpit floor.) I plugged the rear of the rain gutter with silicone, then drilled holes in the bottom. Water now falls onto the walkway instead of flooding the cockpit area.
Click for a Photo
Note: This modification was made on a Sedan. Not sure it’s applicable to the Express or Fisherman models.
Prop Shaft Removal Tools and Techniques
Removal of your prop shafts is not a job to look forward to, but the homemade puller shown below was a great help. Since the space between the flanges is tight, the length of the puller bolt is critical. Better have several different length bolts with you. Also, when you're nearly there, I have to use a 1/2 socket as a spacer to get the hub free in that last, frustrating amount of travel. A bit of additional space would have been nice here!
Click for a Photo
In the below photo, a prop shaft flange is about to be removed. On Marinettes, it’s important to replace aged rubber hoses that connect the packing boxes to the shaft logs. Should one of these hoses fail, enough water could enter that the boat to sink it. And no, your bilge pump could never keep up with a leak that huge.
Click for a Photo
In this photo the puller is in place on the port flange. Note how little room one has to swing a wrench! By the way, I now use a box/ open end wrench instead of the knucklebuster shown.
Click for a Photo
In this photo the starboard flange is finally off (thank heaven!) and the shaft log is exposed. Note the buildup of corrosion on the inside.
Click for a Photo
The components of a Marinette stuffing box assembly {left to right} are shown: The rubber hose that connects the "shaft log" (a pipe welded to the hull) to the stuffing box assembly, the bronze gland, the lock nut, the packing rings (1/4 inch for 1 1/4 inch shafts), and the gland nut. Contrary to most stuffing box designs, the packing rings go inside the gland nut. This is a 1 1/4 inch shaft, but other sizes are similar (but use different size packing rings).
Click for a Photo
A close up shot of a Marinette packing gland nut. Since the packing is placed inside the gland nut, the locking nut MUST be tightened to the gland nut to prevent the assembly from rotating along with the shaft. On the starboard side, the packing gland nut could back right off (in forward), flooding the boat with water; on the port side it could tighten up and burn up the shaft! So, be sure you lock those two nuts tightly together.
Click for a Photo
Here's a shot of the assembly all back together again. Important things to check: 1. Are the set screws (in the flange) seated in those dimples drilled in the shaft? (If not, the shaft could back out of the flange in reverse.) 2. Is the bronze packing gland assembly and aluminum shaft log touching? (They must not touch.) 3. Is the locking nut tightened against the gland nut, locking the gland nut in place? 4. Is there an open circuit between the transmission side flange and the shaft? (There should be no electrical continuity between the shaft and the hull.)
Click for a Photo
The Battle Against Corrosion:
A Possible Way to Reduce the Corrosion Mess Around the Railings
Nearly every Marinette goes through this: corrosion blisters appear on the deck surface near the stainless railing posts. The railings are then removed, the paint sanded to remove the corrosion, the deck repainted, and the railings reinstalled--but it doesn't seem to matter how carefully the repair was done, or if a sealer was used on the screw threads, for the mess will come back in a few years.
A successful approach is to use aluminum rivets to hold the railings in place. The idea is allow the easily-replaced rivets to corrode instead of the deck. The below photo shows the rivets installed in a test piece of scrap aluminum with a Marinette handrailing post attached. The holding strength of the rivets is excellent. A 17/64 inch (just a fraction over 1/4 ") hole is required for them--just the ticket for those already stripped out screw holes.
Note: After 4 years, the rivets have held tightly, and under railing post corrosion has been minimal.
The drawing below the photo is of a homemade installation tool. Hold the 'static' piece, to keep the rivet from rotating, and put about two turns on the rivet with the "nut" (that doesn't strip like a hex nut). A socket head allen bolt is the only high strength bolt I could find in this small size. A regular nut and bolt strips way too easily. Oh, better buy several of each for they wear out quickly.
Note: You can also buy a rivet gun with adapters to set the rivets. I honestly haven't tried it this way, but it's got to be an improvement.
Click for a Photo
Click for a Photo
Corrosion Caused by a Lack of Proper Maintenance
Needless to say, my first sight of this mess was a nasty shock! The damage is confined to the starboard prop area--the port side looks pretty good. How this happened is a mystery--perhaps something got jammed in the prop and it flailed away at the bottom paint (that was not properly applied in the "repair")? Or, perhaps some boob used a bronze-shell cutlass bearing in the strut? Either way, I aged a decade or so upon seeing this mess! Much epoxy putty later it's now flat and smooth again, and it has not caused any trouble after 4 years. Alternatively I could have hired someone to MIG weld the area back to solid aluminum. The bottom line: Sandblasting and proper repainting of this 1985 era hull, years ago, would have prevented this horror scene.
Click for a Photo
Here's an even worse disaster, this time on Keith's 1974, 28 footer. (Keith sandblasted the ENTIRE hull, from gunnel to gunnel, with a 5 hp. potable compressor! That's called dedication.) This was the worst spot in the photos he sent me but, unfortunately, it wasn't the only one. Again, the lack of a complete 'bottom job' (strip to bare metal and redue) after years of usage resulted in the bare metal spots that caused this crevice corrosion mess.
Click for a Photo
Homemade Galvanic Meter
This portable corrosion meter came with my boat since the Capac probe stopped working long ago. The analog meter that was in the box died when it fell overboard one day (don’t ask!), so I replaced it with a digital meter. The cables, for the probe and ground clip, are soldered to the meter leads and strain-relieved inside the box. If your Capac probe has failed, probes such as this can be purchased for 70 to 80 bucks. The meter cost me $4 at Harbor Freight. Buy a box from Radio Shack, along with some cable and a ground clamp, and you’re in good shape. Accuracy of the readings is better than the original Capac setup (whose needle tends to stick). And you can be a hero at your marina by testing other people's boat (long as your marina guys don't mind, or catch you).
Click for a Photo
"Hey, what are those funky looking things?"
This 'loaf of bread' is a magnesium anode, and it sure confuses lots of folks. It is bolted to the trim tab such that it does not interfere with its movement via two, 5/16 bolts threaded into the magnesium from below.
Note: This is for FRESH WATER boats only! Magnesium produces way too much voltage in salt water.
Click for a Photo
"Now, that's a guppy!" (Think of Crocodile Dundee saying this)
This little beauty alone adds 0.15 volts to my galvanic protection system. With a guppy added to mine the readings are too high, but it’s nice to have that option.
Click for a Photo
Protective Zincs in Your Heat Exchangers
Many people don't know this, but there's a zinc element that keeps the tubes of these expensive heat exchangers from rotting out. With replacement costs hovering in the 400 to 600 dollar range, one should replace these zincs on a regular basis. The drain plug in the bottom contains the zinc.
Click for a Photo
Click for a Photo
My Love of Boating in Photos:
The below photos reveal this better than anything I could say. This photo was taken at our old slip. That Great Blue Herron makes its food foray up the bank to the left every evening.
Click for a Photo
Night falls on the Bohemia River.
Click for a Photo
In this photo, night has spectacularly fallen over the Wye River, where we were anchored. Ah, to be there right now!
Click for a Photo
In the below shots we’re cruising the Bush River
Click for a Photo
Note how straight a course the "Admiral" is holding. Not bad, eh?
Click for a Photo
What is it about sunsets and sunrises that excite the imagination? In this photo, the sun is rising over the Chesapeake Bay, at Still Pond.
Click for a Photo
What is it about sunsets and sunrises that excite the imagination? In this photo, the sun is rising over the Chesapeake Bay, at Still Pond.
Click for a Photo
Click for a Photo
In the next photo, the aluminum step plate has been removed. Note that, though is a bit of corrosion near one of the screws, and some black crud hiding below it, there was none of the deep, ugly corrosion found under the railing posts. My conclusion: Those rubber gaskets are bad news!)
Click for a Photo
In the next photo, I'm installing aluminum rivets in 17/64 inch drilled holes. The homemade rivet setter in the left photo works great if there's room to swing the handle. When there isn't, a ratchet and grade 8 bolt and nuts have to do. Get several for they wear out.
Click for a Photo
In the last photo the aluminum rivets have been 'set' and 1/8 “ thick plastic washers are glued on top of them with silicone (since the washers are tough to locate under the posts unless they are glued in place.) A rubber gasket is NOT used, to prevent moisture trapped below the gasket setting up a corrosion cell.
Update: After 4 years, the railing bolts are all still nice and tight, and minimal corrosion has reappeared under the posts.
Click for a Photo
Those Oddball Thermostats
Shown below are the two sizes of thermostats commonly used in Chrysler marine engines. The large 'T-stat' on the right was used in the earlier engines (and cars/ trucks in the late '70s). The smaller 'T-stat' (on the left) has been epoxied and riveted to a stainless steel plate for use in the earlier engine. Why go to all that trouble? Those large, custom t-stats is shockingly expensive, and if the t-stat housing is rusted badly (around the t-stat, as often the case in old, RWCooled engines) water will pass the t-stat to delay warm up and proper temperature control.
Click for a Photo
Getting Water and Junk Out of the Gas
Most Marinettes have these Perko water separator/ filters. If yours needs draining, to remove water and crud, a small glass jar like this one is a great help. Remove the plug, drain the separator, then let the contents sit for a few moments. (Note the water and crud in the bottom of the jar in the photo.) Be sure to use teflon tape on the threads of the plug when you reinstall it. And take it easy tightening that plug or you might wrench the housing loose from the wooden blocks.
Click for a Photo
Where to look for a potential troublemaker; a bad ballast resistor.
Most Chrysler engines use a ballast resistor. If it burns out the engine will start as you crank it, then stall the instant you let go of the ignition switch. Also, the connectors can "fall off" and kill the engine. Better check yours.
Note: Older spark modules used 5 pins; newer ones use only 4. Both work the same--I have one of each on my boat. The fifth pin and the other circuit on the ballast resistor was put there in an exercise in over-engineering by Chrysler, who were famous for such antics.
Click for a Photo
An Additional, Stern Drain Plug
During winter lay up water will collect in the stern when the boat is blocked bow high. The threat of freeze damage forced me to add an extra drain plug here.
Click for a Photo
Changing Oil the Neat and Easy Way
Here’s a 'neat' (literally) way to change engine oil using an old propane tank. You can get these for nothing since the older ones are now illegal. One of your engines (with twins, or a nearby car or truck) is used as a vacuum pump. I use the PVC fitting on the carb for my vacuum source. A 'Tee fitting' in the tank allows air to exit while oil flows to the bottom of the tank through a length of pipe. All you need is a few common fittings, some Ľ inch steel brake tube (that you poke down the oil checking tube hole) and some 3/8 inch hoses for vacuum and oil. You’ll need to unscrew the dipstick fitting at the block to get the tubing down into the oil pan. I also use this rig to suck the oil out of the old filter before disposing of it, avoiding another mess.
Click for a Photo
My Many Battles With Water Getting into the Bilge
There’s some places where I absolutely hate water—like in the cabin, bilge, etc. Below is a photo of a good way to keep water on the cockpit floor from draining into the bilge. These 1.5 x 1/8 inch aluminum strips are sealed to the floor with 3M 5200 to act like a dam.
Click for a Photo
In the next photo, a homemade rain gutter (1 inch aluminum channel) keeps water out of the salon and cockpit areas. (For some reason Marinette omitted these--a major mistake.) The 1/8 inch thick aluminum “deflectors” at the ends were designed and tested the hard way, during a rainstorm! The trick is to aim the water so it falls harmlessly onto the walkway. The rain gutters Marinette installed atop of the side scoops also need to be modified. (Experiment with a hose and you’ll see what I mean--water flows out of them and right onto the cockpit floor.) I plugged the rear of the rain gutter with silicone, then drilled holes in the bottom. Water now falls onto the walkway instead of flooding the cockpit area.
Click for a Photo
Note: This modification was made on a Sedan. Not sure it’s applicable to the Express or Fisherman models.
Prop Shaft Removal Tools and Techniques
Removal of your prop shafts is not a job to look forward to, but the homemade puller shown below was a great help. Since the space between the flanges is tight, the length of the puller bolt is critical. Better have several different length bolts with you. Also, when you're nearly there, I have to use a 1/2 socket as a spacer to get the hub free in that last, frustrating amount of travel. A bit of additional space would have been nice here!
Click for a Photo
In the below photo, a prop shaft flange is about to be removed. On Marinettes, it’s important to replace aged rubber hoses that connect the packing boxes to the shaft logs. Should one of these hoses fail, enough water could enter that the boat to sink it. And no, your bilge pump could never keep up with a leak that huge.
Click for a Photo
In this photo the puller is in place on the port flange. Note how little room one has to swing a wrench! By the way, I now use a box/ open end wrench instead of the knucklebuster shown.
Click for a Photo
In this photo the starboard flange is finally off (thank heaven!) and the shaft log is exposed. Note the buildup of corrosion on the inside.
Click for a Photo
The components of a Marinette stuffing box assembly {left to right} are shown: The rubber hose that connects the "shaft log" (a pipe welded to the hull) to the stuffing box assembly, the bronze gland, the lock nut, the packing rings (1/4 inch for 1 1/4 inch shafts), and the gland nut. Contrary to most stuffing box designs, the packing rings go inside the gland nut. This is a 1 1/4 inch shaft, but other sizes are similar (but use different size packing rings).
Click for a Photo
A close up shot of a Marinette packing gland nut. Since the packing is placed inside the gland nut, the locking nut MUST be tightened to the gland nut to prevent the assembly from rotating along with the shaft. On the starboard side, the packing gland nut could back right off (in forward), flooding the boat with water; on the port side it could tighten up and burn up the shaft! So, be sure you lock those two nuts tightly together.
Click for a Photo
Here's a shot of the assembly all back together again. Important things to check: 1. Are the set screws (in the flange) seated in those dimples drilled in the shaft? (If not, the shaft could back out of the flange in reverse.) 2. Is the bronze packing gland assembly and aluminum shaft log touching? (They must not touch.) 3. Is the locking nut tightened against the gland nut, locking the gland nut in place? 4. Is there an open circuit between the transmission side flange and the shaft? (There should be no electrical continuity between the shaft and the hull.)
Click for a Photo
The Battle Against Corrosion:
A Possible Way to Reduce the Corrosion Mess Around the Railings
Nearly every Marinette goes through this: corrosion blisters appear on the deck surface near the stainless railing posts. The railings are then removed, the paint sanded to remove the corrosion, the deck repainted, and the railings reinstalled--but it doesn't seem to matter how carefully the repair was done, or if a sealer was used on the screw threads, for the mess will come back in a few years.
A successful approach is to use aluminum rivets to hold the railings in place. The idea is allow the easily-replaced rivets to corrode instead of the deck. The below photo shows the rivets installed in a test piece of scrap aluminum with a Marinette handrailing post attached. The holding strength of the rivets is excellent. A 17/64 inch (just a fraction over 1/4 ") hole is required for them--just the ticket for those already stripped out screw holes.
Note: After 4 years, the rivets have held tightly, and under railing post corrosion has been minimal.
The drawing below the photo is of a homemade installation tool. Hold the 'static' piece, to keep the rivet from rotating, and put about two turns on the rivet with the "nut" (that doesn't strip like a hex nut). A socket head allen bolt is the only high strength bolt I could find in this small size. A regular nut and bolt strips way too easily. Oh, better buy several of each for they wear out quickly.
Note: You can also buy a rivet gun with adapters to set the rivets. I honestly haven't tried it this way, but it's got to be an improvement.
Click for a Photo
Click for a Photo
Corrosion Caused by a Lack of Proper Maintenance
Needless to say, my first sight of this mess was a nasty shock! The damage is confined to the starboard prop area--the port side looks pretty good. How this happened is a mystery--perhaps something got jammed in the prop and it flailed away at the bottom paint (that was not properly applied in the "repair")? Or, perhaps some boob used a bronze-shell cutlass bearing in the strut? Either way, I aged a decade or so upon seeing this mess! Much epoxy putty later it's now flat and smooth again, and it has not caused any trouble after 4 years. Alternatively I could have hired someone to MIG weld the area back to solid aluminum. The bottom line: Sandblasting and proper repainting of this 1985 era hull, years ago, would have prevented this horror scene.
Click for a Photo
Here's an even worse disaster, this time on Keith's 1974, 28 footer. (Keith sandblasted the ENTIRE hull, from gunnel to gunnel, with a 5 hp. potable compressor! That's called dedication.) This was the worst spot in the photos he sent me but, unfortunately, it wasn't the only one. Again, the lack of a complete 'bottom job' (strip to bare metal and redue) after years of usage resulted in the bare metal spots that caused this crevice corrosion mess.
Click for a Photo
Homemade Galvanic Meter
This portable corrosion meter came with my boat since the Capac probe stopped working long ago. The analog meter that was in the box died when it fell overboard one day (don’t ask!), so I replaced it with a digital meter. The cables, for the probe and ground clip, are soldered to the meter leads and strain-relieved inside the box. If your Capac probe has failed, probes such as this can be purchased for 70 to 80 bucks. The meter cost me $4 at Harbor Freight. Buy a box from Radio Shack, along with some cable and a ground clamp, and you’re in good shape. Accuracy of the readings is better than the original Capac setup (whose needle tends to stick). And you can be a hero at your marina by testing other people's boat (long as your marina guys don't mind, or catch you).
Click for a Photo
"Hey, what are those funky looking things?"
This 'loaf of bread' is a magnesium anode, and it sure confuses lots of folks. It is bolted to the trim tab such that it does not interfere with its movement via two, 5/16 bolts threaded into the magnesium from below.
Note: This is for FRESH WATER boats only! Magnesium produces way too much voltage in salt water.
Click for a Photo
"Now, that's a guppy!" (Think of Crocodile Dundee saying this)
This little beauty alone adds 0.15 volts to my galvanic protection system. With a guppy added to mine the readings are too high, but it’s nice to have that option.
Click for a Photo
Protective Zincs in Your Heat Exchangers
Many people don't know this, but there's a zinc element that keeps the tubes of these expensive heat exchangers from rotting out. With replacement costs hovering in the 400 to 600 dollar range, one should replace these zincs on a regular basis. The drain plug in the bottom contains the zinc.
Click for a Photo
Click for a Photo
My Love of Boating in Photos:
The below photos reveal this better than anything I could say. This photo was taken at our old slip. That Great Blue Herron makes its food foray up the bank to the left every evening.
Click for a Photo
Night falls on the Bohemia River.
Click for a Photo
In this photo, night has spectacularly fallen over the Wye River, where we were anchored. Ah, to be there right now!
Click for a Photo
In the below shots we’re cruising the Bush River
Click for a Photo
Note how straight a course the "Admiral" is holding. Not bad, eh?
Click for a Photo
What is it about sunsets and sunrises that excite the imagination? In this photo, the sun is rising over the Chesapeake Bay, at Still Pond.
Click for a Photo
What is it about sunsets and sunrises that excite the imagination? In this photo, the sun is rising over the Chesapeake Bay, at Still Pond.
Click for a Photo
Getting Water and Junk Out of the Gas
Most Marinettes have these Perko water separator/ filters. If yours needs draining, to remove water and crud, a small glass jar like this one is a great help. Remove the plug, drain the separator, then let the contents sit for a few moments. (Note the water and crud in the bottom of the jar in the photo.) Be sure to use teflon tape on the threads of the plug when you reinstall it. And take it easy tightening that plug or you might wrench the housing loose from the wooden blocks.
Click for a Photo
Where to look for a potential troublemaker; a bad ballast resistor.
Most Chrysler engines use a ballast resistor. If it burns out the engine will start as you crank it, then stall the instant you let go of the ignition switch. Also, the connectors can "fall off" and kill the engine. Better check yours.
Note: Older spark modules used 5 pins; newer ones use only 4. Both work the same--I have one of each on my boat. The fifth pin and the other circuit on the ballast resistor was put there in an exercise in over-engineering by Chrysler, who were famous for such antics.
Click for a Photo
An Additional, Stern Drain Plug
During winter lay up water will collect in the stern when the boat is blocked bow high. The threat of freeze damage forced me to add an extra drain plug here.
Click for a Photo
Changing Oil the Neat and Easy Way
Here’s a 'neat' (literally) way to change engine oil using an old propane tank. You can get these for nothing since the older ones are now illegal. One of your engines (with twins, or a nearby car or truck) is used as a vacuum pump. I use the PVC fitting on the carb for my vacuum source. A 'Tee fitting' in the tank allows air to exit while oil flows to the bottom of the tank through a length of pipe. All you need is a few common fittings, some Ľ inch steel brake tube (that you poke down the oil checking tube hole) and some 3/8 inch hoses for vacuum and oil. You’ll need to unscrew the dipstick fitting at the block to get the tubing down into the oil pan. I also use this rig to suck the oil out of the old filter before disposing of it, avoiding another mess.
Click for a Photo
My Many Battles With Water Getting into the Bilge
There’s some places where I absolutely hate water—like in the cabin, bilge, etc. Below is a photo of a good way to keep water on the cockpit floor from draining into the bilge. These 1.5 x 1/8 inch aluminum strips are sealed to the floor with 3M 5200 to act like a dam.
Click for a Photo
In the next photo, a homemade rain gutter (1 inch aluminum channel) keeps water out of the salon and cockpit areas. (For some reason Marinette omitted these--a major mistake.) The 1/8 inch thick aluminum “deflectors” at the ends were designed and tested the hard way, during a rainstorm! The trick is to aim the water so it falls harmlessly onto the walkway. The rain gutters Marinette installed atop of the side scoops also need to be modified. (Experiment with a hose and you’ll see what I mean--water flows out of them and right onto the cockpit floor.) I plugged the rear of the rain gutter with silicone, then drilled holes in the bottom. Water now falls onto the walkway instead of flooding the cockpit area.
Click for a Photo
Note: This modification was made on a Sedan. Not sure it’s applicable to the Express or Fisherman models.
Prop Shaft Removal Tools and Techniques
Removal of your prop shafts is not a job to look forward to, but the homemade puller shown below was a great help. Since the space between the flanges is tight, the length of the puller bolt is critical. Better have several different length bolts with you. Also, when you're nearly there, I have to use a 1/2 socket as a spacer to get the hub free in that last, frustrating amount of travel. A bit of additional space would have been nice here!
Click for a Photo
In the below photo, a prop shaft flange is about to be removed. On Marinettes, it’s important to replace aged rubber hoses that connect the packing boxes to the shaft logs. Should one of these hoses fail, enough water could enter that the boat to sink it. And no, your bilge pump could never keep up with a leak that huge.
Click for a Photo
In this photo the puller is in place on the port flange. Note how little room one has to swing a wrench! By the way, I now use a box/ open end wrench instead of the knucklebuster shown.
Click for a Photo
In this photo the starboard flange is finally off (thank heaven!) and the shaft log is exposed. Note the buildup of corrosion on the inside.
Click for a Photo
The components of a Marinette stuffing box assembly {left to right} are shown: The rubber hose that connects the "shaft log" (a pipe welded to the hull) to the stuffing box assembly, the bronze gland, the lock nut, the packing rings (1/4 inch for 1 1/4 inch shafts), and the gland nut. Contrary to most stuffing box designs, the packing rings go inside the gland nut. This is a 1 1/4 inch shaft, but other sizes are similar (but use different size packing rings).
Click for a Photo
A close up shot of a Marinette packing gland nut. Since the packing is placed inside the gland nut, the locking nut MUST be tightened to the gland nut to prevent the assembly from rotating along with the shaft. On the starboard side, the packing gland nut could back right off (in forward), flooding the boat with water; on the port side it could tighten up and burn up the shaft! So, be sure you lock those two nuts tightly together.
Click for a Photo
Here's a shot of the assembly all back together again. Important things to check: 1. Are the set screws (in the flange) seated in those dimples drilled in the shaft? (If not, the shaft could back out of the flange in reverse.) 2. Is the bronze packing gland assembly and aluminum shaft log touching? (They must not touch.) 3. Is the locking nut tightened against the gland nut, locking the gland nut in place? 4. Is there an open circuit between the transmission side flange and the shaft? (There should be no electrical continuity between the shaft and the hull.)
Click for a Photo
The Battle Against Corrosion:
A Possible Way to Reduce the Corrosion Mess Around the Railings
Nearly every Marinette goes through this: corrosion blisters appear on the deck surface near the stainless railing posts. The railings are then removed, the paint sanded to remove the corrosion, the deck repainted, and the railings reinstalled--but it doesn't seem to matter how carefully the repair was done, or if a sealer was used on the screw threads, for the mess will come back in a few years.
A successful approach is to use aluminum rivets to hold the railings in place. The idea is allow the easily-replaced rivets to corrode instead of the deck. The below photo shows the rivets installed in a test piece of scrap aluminum with a Marinette handrailing post attached. The holding strength of the rivets is excellent. A 17/64 inch (just a fraction over 1/4 ") hole is required for them--just the ticket for those already stripped out screw holes.
Note: After 4 years, the rivets have held tightly, and under railing post corrosion has been minimal.
The drawing below the photo is of a homemade installation tool. Hold the 'static' piece, to keep the rivet from rotating, and put about two turns on the rivet with the "nut" (that doesn't strip like a hex nut). A socket head allen bolt is the only high strength bolt I could find in this small size. A regular nut and bolt strips way too easily. Oh, better buy several of each for they wear out quickly.
Note: You can also buy a rivet gun with adapters to set the rivets. I honestly haven't tried it this way, but it's got to be an improvement.
Click for a Photo
Click for a Photo
Corrosion Caused by a Lack of Proper Maintenance
Needless to say, my first sight of this mess was a nasty shock! The damage is confined to the starboard prop area--the port side looks pretty good. How this happened is a mystery--perhaps something got jammed in the prop and it flailed away at the bottom paint (that was not properly applied in the "repair")? Or, perhaps some boob used a bronze-shell cutlass bearing in the strut? Either way, I aged a decade or so upon seeing this mess! Much epoxy putty later it's now flat and smooth again, and it has not caused any trouble after 4 years. Alternatively I could have hired someone to MIG weld the area back to solid aluminum. The bottom line: Sandblasting and proper repainting of this 1985 era hull, years ago, would have prevented this horror scene.
Click for a Photo
Here's an even worse disaster, this time on Keith's 1974, 28 footer. (Keith sandblasted the ENTIRE hull, from gunnel to gunnel, with a 5 hp. potable compressor! That's called dedication.) This was the worst spot in the photos he sent me but, unfortunately, it wasn't the only one. Again, the lack of a complete 'bottom job' (strip to bare metal and redue) after years of usage resulted in the bare metal spots that caused this crevice corrosion mess.
Click for a Photo
Homemade Galvanic Meter
This portable corrosion meter came with my boat since the Capac probe stopped working long ago. The analog meter that was in the box died when it fell overboard one day (don’t ask!), so I replaced it with a digital meter. The cables, for the probe and ground clip, are soldered to the meter leads and strain-relieved inside the box. If your Capac probe has failed, probes such as this can be purchased for 70 to 80 bucks. The meter cost me $4 at Harbor Freight. Buy a box from Radio Shack, along with some cable and a ground clamp, and you’re in good shape. Accuracy of the readings is better than the original Capac setup (whose needle tends to stick). And you can be a hero at your marina by testing other people's boat (long as your marina guys don't mind, or catch you).
Click for a Photo
"Hey, what are those funky looking things?"
This 'loaf of bread' is a magnesium anode, and it sure confuses lots of folks. It is bolted to the trim tab such that it does not interfere with its movement via two, 5/16 bolts threaded into the magnesium from below.
Note: This is for FRESH WATER boats only! Magnesium produces way too much voltage in salt water.
Click for a Photo
"Now, that's a guppy!" (Think of Crocodile Dundee saying this)
This little beauty alone adds 0.15 volts to my galvanic protection system. With a guppy added to mine the readings are too high, but it’s nice to have that option.
Click for a Photo
Protective Zincs in Your Heat Exchangers
Many people don't know this, but there's a zinc element that keeps the tubes of these expensive heat exchangers from rotting out. With replacement costs hovering in the 400 to 600 dollar range, one should replace these zincs on a regular basis. The drain plug in the bottom contains the zinc.
Click for a Photo
Click for a Photo
My Love of Boating in Photos:
The below photos reveal this better than anything I could say. This photo was taken at our old slip. That Great Blue Herron makes its food foray up the bank to the left every evening.
Click for a Photo
Night falls on the Bohemia River.
Click for a Photo
In this photo, night has spectacularly fallen over the Wye River, where we were anchored. Ah, to be there right now!
Click for a Photo
In the below shots we’re cruising the Bush River
Click for a Photo
Note how straight a course the "Admiral" is holding. Not bad, eh?
Click for a Photo
What is it about sunsets and sunrises that excite the imagination? In this photo, the sun is rising over the Chesapeake Bay, at Still Pond.
Click for a Photo
What is it about sunsets and sunrises that excite the imagination? In this photo, the sun is rising over the Chesapeake Bay, at Still Pond.
Click for a Photo
My Many Battles With Water Getting into the Bilge
There’s some places where I absolutely hate water—like in the cabin, bilge, etc. Below is a photo of a good way to keep water on the cockpit floor from draining into the bilge. These 1.5 x 1/8 inch aluminum strips are sealed to the floor with 3M 5200 to act like a dam.
Click for a Photo
In the next photo, a homemade rain gutter (1 inch aluminum channel) keeps water out of the salon and cockpit areas. (For some reason Marinette omitted these--a major mistake.) The 1/8 inch thick aluminum “deflectors” at the ends were designed and tested the hard way, during a rainstorm! The trick is to aim the water so it falls harmlessly onto the walkway. The rain gutters Marinette installed atop of the side scoops also need to be modified. (Experiment with a hose and you’ll see what I mean--water flows out of them and right onto the cockpit floor.) I plugged the rear of the rain gutter with silicone, then drilled holes in the bottom. Water now falls onto the walkway instead of flooding the cockpit area.
Click for a Photo
Note: This modification was made on a Sedan. Not sure it’s applicable to the Express or Fisherman models.
Prop Shaft Removal Tools and Techniques
Removal of your prop shafts is not a job to look forward to, but the homemade puller shown below was a great help. Since the space between the flanges is tight, the length of the puller bolt is critical. Better have several different length bolts with you. Also, when you're nearly there, I have to use a 1/2 socket as a spacer to get the hub free in that last, frustrating amount of travel. A bit of additional space would have been nice here!
Click for a Photo
In the below photo, a prop shaft flange is about to be removed. On Marinettes, it’s important to replace aged rubber hoses that connect the packing boxes to the shaft logs. Should one of these hoses fail, enough water could enter that the boat to sink it. And no, your bilge pump could never keep up with a leak that huge.
Click for a Photo
In this photo the puller is in place on the port flange. Note how little room one has to swing a wrench! By the way, I now use a box/ open end wrench instead of the knucklebuster shown.
Click for a Photo
In this photo the starboard flange is finally off (thank heaven!) and the shaft log is exposed. Note the buildup of corrosion on the inside.
Click for a Photo
The components of a Marinette stuffing box assembly {left to right} are shown: The rubber hose that connects the "shaft log" (a pipe welded to the hull) to the stuffing box assembly, the bronze gland, the lock nut, the packing rings (1/4 inch for 1 1/4 inch shafts), and the gland nut. Contrary to most stuffing box designs, the packing rings go inside the gland nut. This is a 1 1/4 inch shaft, but other sizes are similar (but use different size packing rings).
Click for a Photo
A close up shot of a Marinette packing gland nut. Since the packing is placed inside the gland nut, the locking nut MUST be tightened to the gland nut to prevent the assembly from rotating along with the shaft. On the starboard side, the packing gland nut could back right off (in forward), flooding the boat with water; on the port side it could tighten up and burn up the shaft! So, be sure you lock those two nuts tightly together.
Click for a Photo
Here's a shot of the assembly all back together again. Important things to check: 1. Are the set screws (in the flange) seated in those dimples drilled in the shaft? (If not, the shaft could back out of the flange in reverse.) 2. Is the bronze packing gland assembly and aluminum shaft log touching? (They must not touch.) 3. Is the locking nut tightened against the gland nut, locking the gland nut in place? 4. Is there an open circuit between the transmission side flange and the shaft? (There should be no electrical continuity between the shaft and the hull.)
Click for a Photo
The Battle Against Corrosion:
A Possible Way to Reduce the Corrosion Mess Around the Railings
Nearly every Marinette goes through this: corrosion blisters appear on the deck surface near the stainless railing posts. The railings are then removed, the paint sanded to remove the corrosion, the deck repainted, and the railings reinstalled--but it doesn't seem to matter how carefully the repair was done, or if a sealer was used on the screw threads, for the mess will come back in a few years.
A successful approach is to use aluminum rivets to hold the railings in place. The idea is allow the easily-replaced rivets to corrode instead of the deck. The below photo shows the rivets installed in a test piece of scrap aluminum with a Marinette handrailing post attached. The holding strength of the rivets is excellent. A 17/64 inch (just a fraction over 1/4 ") hole is required for them--just the ticket for those already stripped out screw holes.
Note: After 4 years, the rivets have held tightly, and under railing post corrosion has been minimal.
The drawing below the photo is of a homemade installation tool. Hold the 'static' piece, to keep the rivet from rotating, and put about two turns on the rivet with the "nut" (that doesn't strip like a hex nut). A socket head allen bolt is the only high strength bolt I could find in this small size. A regular nut and bolt strips way too easily. Oh, better buy several of each for they wear out quickly.
Note: You can also buy a rivet gun with adapters to set the rivets. I honestly haven't tried it this way, but it's got to be an improvement.
Click for a Photo
Click for a Photo
Corrosion Caused by a Lack of Proper Maintenance
Needless to say, my first sight of this mess was a nasty shock! The damage is confined to the starboard prop area--the port side looks pretty good. How this happened is a mystery--perhaps something got jammed in the prop and it flailed away at the bottom paint (that was not properly applied in the "repair")? Or, perhaps some boob used a bronze-shell cutlass bearing in the strut? Either way, I aged a decade or so upon seeing this mess! Much epoxy putty later it's now flat and smooth again, and it has not caused any trouble after 4 years. Alternatively I could have hired someone to MIG weld the area back to solid aluminum. The bottom line: Sandblasting and proper repainting of this 1985 era hull, years ago, would have prevented this horror scene.
Click for a Photo
Here's an even worse disaster, this time on Keith's 1974, 28 footer. (Keith sandblasted the ENTIRE hull, from gunnel to gunnel, with a 5 hp. potable compressor! That's called dedication.) This was the worst spot in the photos he sent me but, unfortunately, it wasn't the only one. Again, the lack of a complete 'bottom job' (strip to bare metal and redue) after years of usage resulted in the bare metal spots that caused this crevice corrosion mess.
Click for a Photo
Homemade Galvanic Meter
This portable corrosion meter came with my boat since the Capac probe stopped working long ago. The analog meter that was in the box died when it fell overboard one day (don’t ask!), so I replaced it with a digital meter. The cables, for the probe and ground clip, are soldered to the meter leads and strain-relieved inside the box. If your Capac probe has failed, probes such as this can be purchased for 70 to 80 bucks. The meter cost me $4 at Harbor Freight. Buy a box from Radio Shack, along with some cable and a ground clamp, and you’re in good shape. Accuracy of the readings is better than the original Capac setup (whose needle tends to stick). And you can be a hero at your marina by testing other people's boat (long as your marina guys don't mind, or catch you).
Click for a Photo
"Hey, what are those funky looking things?"
This 'loaf of bread' is a magnesium anode, and it sure confuses lots of folks. It is bolted to the trim tab such that it does not interfere with its movement via two, 5/16 bolts threaded into the magnesium from below.
Note: This is for FRESH WATER boats only! Magnesium produces way too much voltage in salt water.
Click for a Photo
"Now, that's a guppy!" (Think of Crocodile Dundee saying this)
This little beauty alone adds 0.15 volts to my galvanic protection system. With a guppy added to mine the readings are too high, but it’s nice to have that option.
Click for a Photo
Protective Zincs in Your Heat Exchangers
Many people don't know this, but there's a zinc element that keeps the tubes of these expensive heat exchangers from rotting out. With replacement costs hovering in the 400 to 600 dollar range, one should replace these zincs on a regular basis. The drain plug in the bottom contains the zinc.
Click for a Photo
Click for a Photo
My Love of Boating in Photos:
The below photos reveal this better than anything I could say. This photo was taken at our old slip. That Great Blue Herron makes its food foray up the bank to the left every evening.
Click for a Photo
Night falls on the Bohemia River.
Click for a Photo
In this photo, night has spectacularly fallen over the Wye River, where we were anchored. Ah, to be there right now!
Click for a Photo
In the below shots we’re cruising the Bush River
Click for a Photo
Note how straight a course the "Admiral" is holding. Not bad, eh?
Click for a Photo
What is it about sunsets and sunrises that excite the imagination? In this photo, the sun is rising over the Chesapeake Bay, at Still Pond.
Click for a Photo
What is it about sunsets and sunrises that excite the imagination? In this photo, the sun is rising over the Chesapeake Bay, at Still Pond.
A close up shot of a Marinette packing gland nut. Since the packing is placed inside the gland nut, the locking nut MUST be tightened to the gland nut to prevent the assembly from rotating along with the shaft. On the starboard side, the packing gland nut could back right off (in forward), flooding the boat with water; on the port side it could tighten up and burn up the shaft! So, be sure you lock those two nuts tightly together.